
CARMIS allows you to generate bulk uploads based on client and service information and submit them IRCC/iCARE. These files can be submitted via iCARE's website.
Please Note: We recommend always submitting a Client Profile bulk upload prior to submitting other types of bulk uploads. This will update iCARE's records and will prevent most file rejections.


Note: it is recommended to perform bulk uploads monthly.
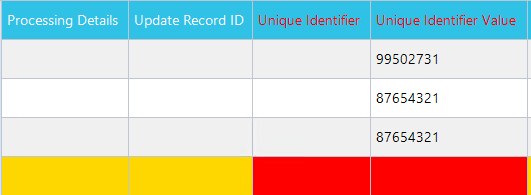
- If CARMIS has detected missing/corrupt data, it will be shown in yellow and red. Yellow indicates that the row has one or more missing/corrupt fields, while red is used to indicate the fields themselves.
- If you find a row you would like to change, you can:
- Click on the first cell (column A) of the row to change client-related information
- Click on the second cell (column B) of the row to change record-related information
Note that these changes will apply across CARMIS.
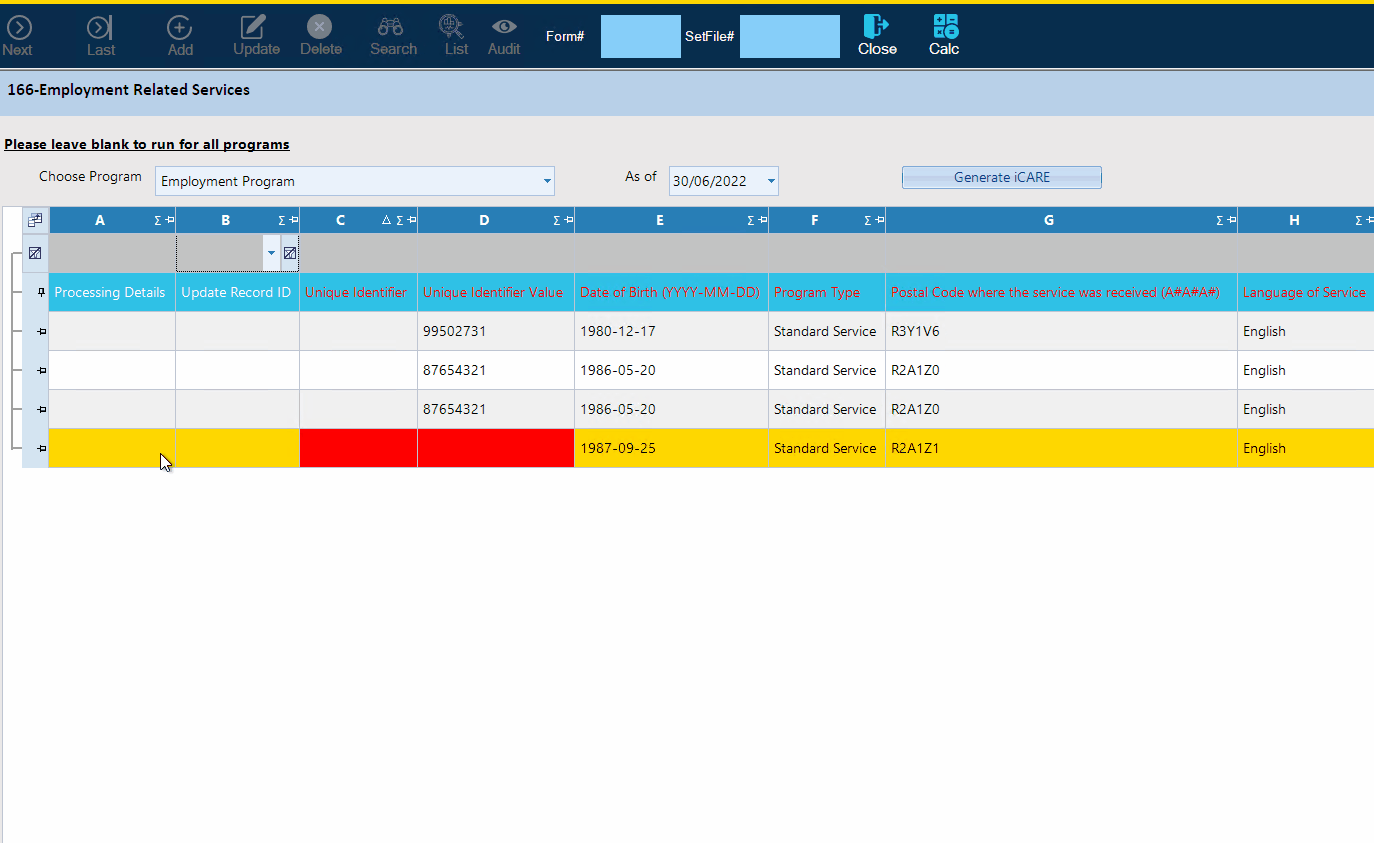
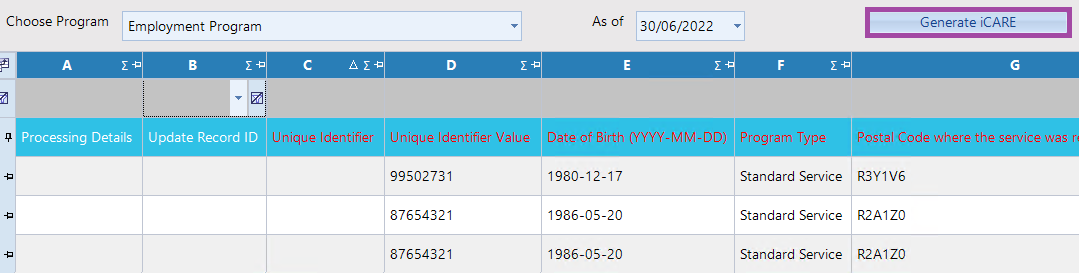
- After making any changes, make sure to click the "Refresh Data" button from the bottom of the form to so it re-generates with the updated information.

-
You can preview your changes with the "iCARE Draft" button.
Note: Use the "iCARE Draft" button for previews only. When it comes to the final version that you are submitting to iCARE, use the "iCARE Final - To Upload" button.

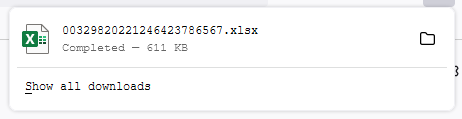
- Your web browser will open automatically, and an Excel version of the report will be downloaded.
- If you notice any data you would like to change in the preview report, first return to CARMIS to make the changes there (see step 6).
-
Once you are satisfied with the report, return to CARMIS and proceed to step 8.

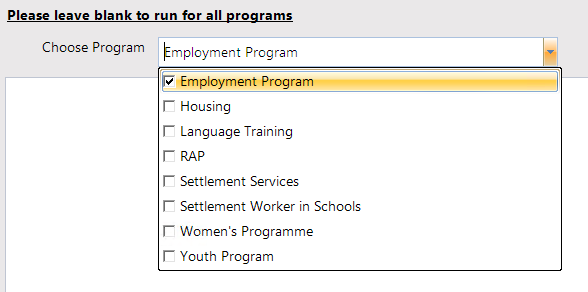
Step 9: Generate any other bulk uploads that you are planning to submit.
We recommend always submitting a Client Profile bulk upload prior to submitting other types of bulk uploads. This will update iCARE's records and will prevent most file rejections.

Frequently Asked Questions
Why does the Client Profile bulk upload need to be submitted first?
Part of iCARE's validation process involves comparing its client profile data to service data. Uploading the Client Profile bulk upload first will update iCARE's internal client records, which will prevent rejections related to missing or mismatching client profile information.
Why do some clients appear in bulk uploads after their bulk uploads were already submitted?
The Client Profile bulk upload will contain any new or updated clients. If a client's profile was updated recently, then they may appear in the next bulk upload if any IRCC-specific information was changed.
Why do my bulk uploads appear empty?
In most cases, this is due to a bulk upload having been performed recently. When the Final - To Upload function generates a bulk upload, it marks any included records as "submitted". Submitted records are omitted from future bulk uploads.
Please check the following:
- For one-on-one services or assessments, please ensure the record is marked as Completed instead of Ongoing.
- Check the Program and Activity of the record. Some programs and activities may not be IRCC-funded.
- Check the Status in Canada (Immigration Status) of the related client. Some statuses may not be IRCC-funded.
I have an issue that isn't covered in this article - how can it be resolved?
If you are having an ongoing issue with bulk uploads that isn't addressed in this article, please contact us at support@nsdtech.com.