
CARMIS users can send emails to their clients from within CARMIS itself. Other stakeholders such as Employers, Volunteers, Colleagues (other CARMIS users within the organization) and external Service Partners can also be sent emails.
Some salient features of this functionality:
- All emails are sent to one person at a time, so the recipients cannot see each other’s email addresses.
- All emails are also logged under the case notes for Clients, Employers & Volunteers as applicable, for future references.
- Any client specific emails also be mapped for iCare reporting, if applicable for your organizational workflows.
- Users can create email templates for future reusability.
Sections:
Composing and Sending An Email:
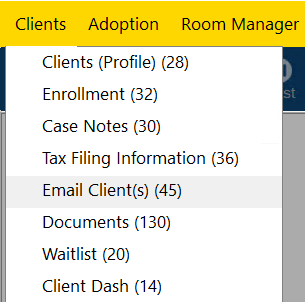
Step 1: Using the top navigation menu, navigate to the Clients > Email Client(s) (45).
This will open the email client form shown below.
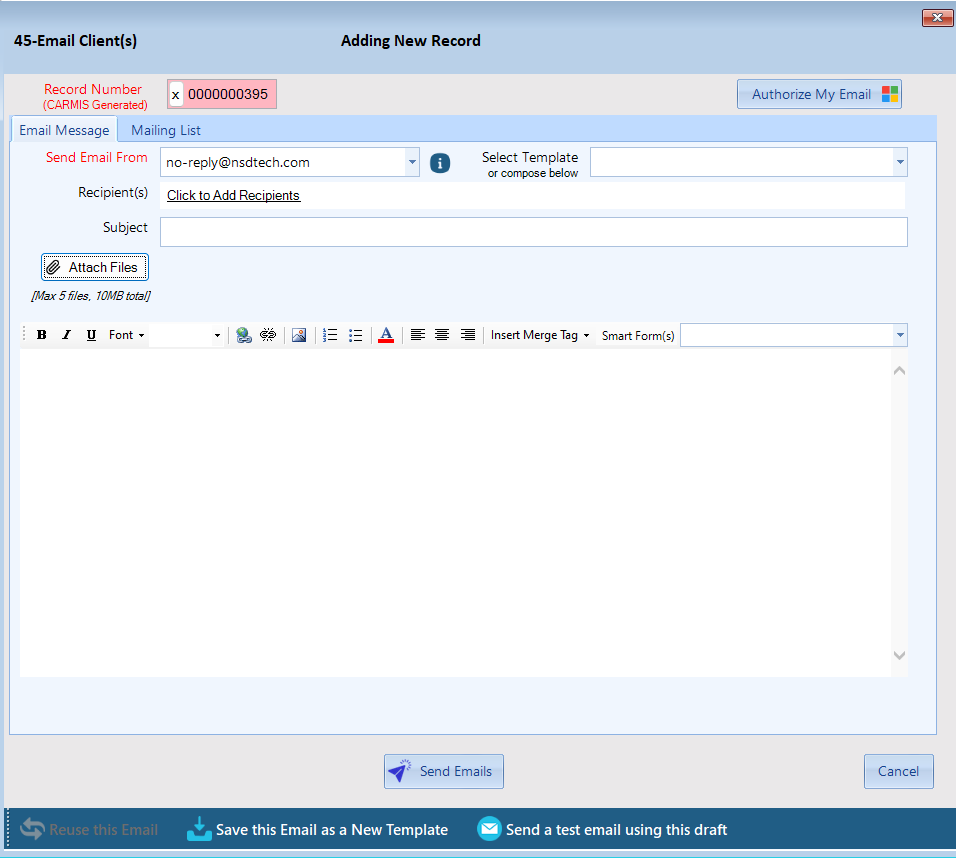
Step 3: Begin by entering all the necessary information for your email. You can also change who is sending the email by selecting the field "Send Email From", from default it will be set to no-reply of your organization. Please note: If you have saved email templates, you can select one by clicking the drop-down menu on "Email Template" and choosing your desired template.
If your email address is not authorized through CARMIS, the "Send Email From" field will default to the organization's global email address. If your email is authorized, the email you registered will be used as the "Send Email From" address. To learn more about authorizing your email with CARMIS, please read our article on: How to Authorize your email account to send emails from CARMIS
On the field 'Recipient(s)', clicking 'Click to Add Recipients' will take you to the 'Mailing List' tab. Please see 'Step 6' to learn more about how to add recipients.
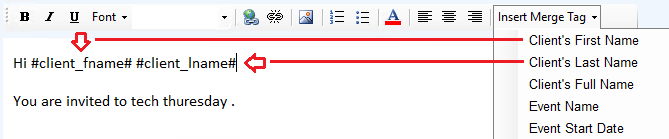
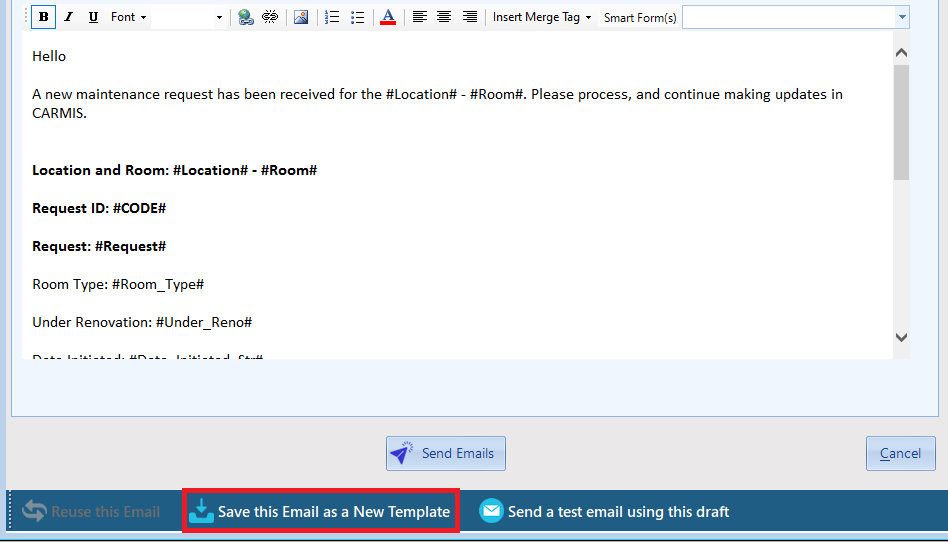
Step 4: While entering information in the "Message" field, you can also use the "Insert Merge Tag". A merge tag is like a placeholder text which is replaced with information as an email is sent to a client.

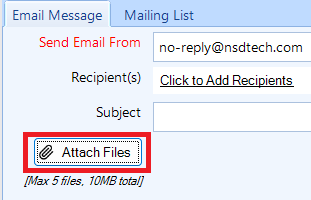
Step 5: You have the ability to attach up to 5 documents to your email. To attach document(s) click on "Select" under Attachment(s) and select your files. Please note: You can only attach up to 5 documents under 10 MB max only. If you would like to learn more about uploading documents, please see our article How to Upload Documents.
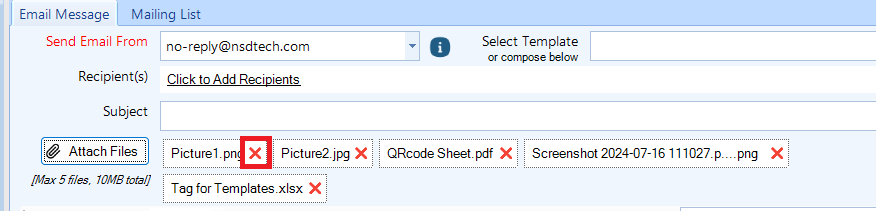
To remove an attached document, click the red "X" button. This will delete the attachment.
Step 6: To select who will receive the email, please navigate to the tab "Mailing List". From the Mailing List, we have categorized who will receive the email. Click on "?" to select whom you would like to send the email too. You can also multi-select more than one person to send the email to as well.
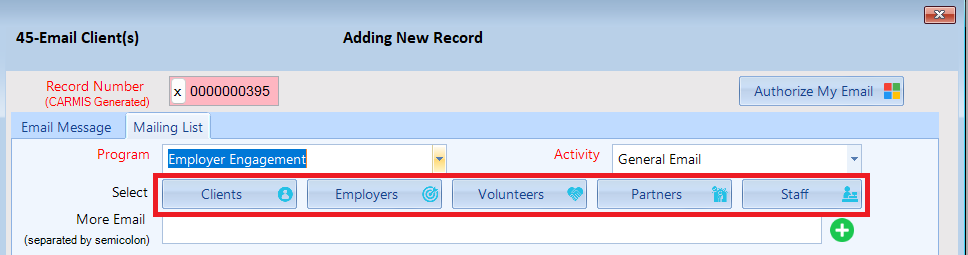
Once you have selected whom you want to send the email too. Please select the "Program" and "Activity" under "Record Case Note under" for which auto activity should be recorded.
Step 7: You can double check if you have selected the correct people you want to send the email to by viewing the recipients list. This list will show you detailed information on who you have selected. If you have made a mistake on who you want to send the email too, you can simply remove them from the list by clicking on the red x button under Remove.
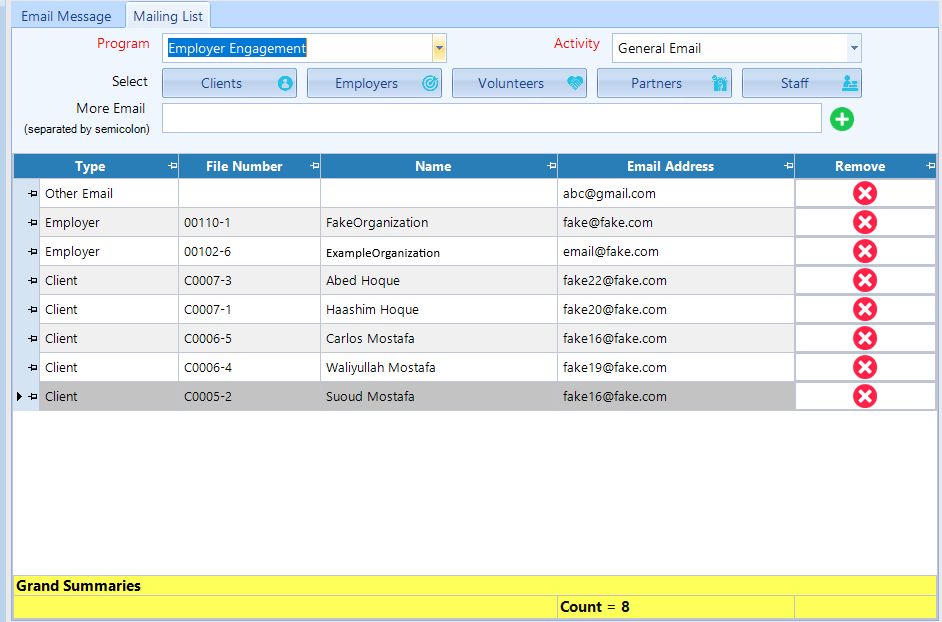
To add more email recipients, type the email address in the "More Email" textbox and click the green "+" button. The email will then be added as a recipient.
Step 8: Once all information is complete, click on Send Emails to send the email.

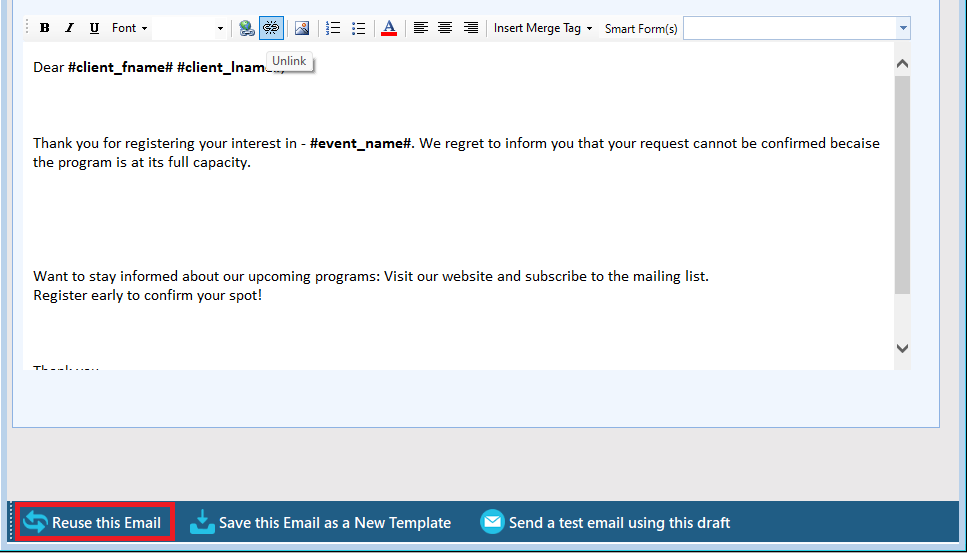
Send a Test Email Using This Draft:
The "Send a Test Email Using This Draft" button lets you send a test email to check how the final email will look before sending it to actual recipients.
Step 1: Enter all the necessary information for the email. Once complete, click the "Send a Test Email Using This Draft" button.
Step 2: When clicked a new window will appear. Enter the email address where you'd like the test email to be sent.
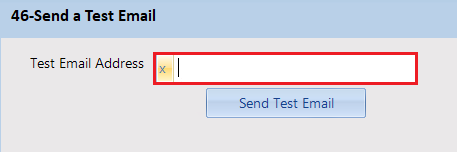
Step 3: Click "Send Test Email." The test email will be sent only to the email address you entered, not to any other recipients.
Saving a Template:
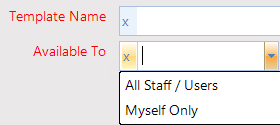
Please write a name for the template under, "Template Name". Under Available, you have two options:
All Staff / Users: Selecting this option will make this template available to all members in the agency/organization.
Myself: Selection this option will make the template only visible to your account.
Step 2: Once all changes have been made, click on "Save" at the bottom of the window.
Updating a Template:
Please Note: Only Admins can Update templates, if you do not have access to admin, please contact your administrator for these changes.
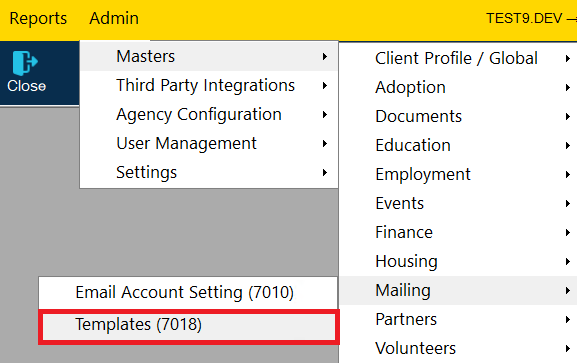
Step 1: Using the top navigation menu, navigate to the Admin > Masters > Mailing > Templates (7018).
This will open the Template form shown below.

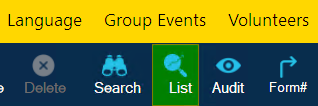
Step 2: Click "List" from the toolbar to view all the templates stored, double click on a template to view it.
Step 3: Once a Template has been selected, click on Update on the tool bar and make your desired changes.
Step 4: Once all changes have been made, click on "Save" at the bottom of the window.
Deleting a Template:
Please Note: Only Admins can Delete templates, if you do not have access to admin, please contact your administrator for these changes.
Step 1: Using the top navigation menu, navigate to the Admin > Masters > Mailing > Templates (7018).
Step 2: Click "List" from the toolbar to view all the templates stored, double click on a template to view it.
Step 3: Once a Template has been selected, click on Delete" on the toolbar, CARMIS will ask for a confirmation on the deletion of the template, click "Yes" to confirm deletion of the template.
Reuse This Email:
The "Reuse This Email" button allows you to create a new email from a previously sent email. Please note, that the recipients from the original email will not be included. You will need to add new recipients before sending. Additionally, attachments will not be saved as well, you will need reattach the documents to the email.
Step 1: Search for the previous email you would like to use for the new email
Step 2: Once selected, click "Reuse This Email" button located at the bottom left of the window.
Frequently Asked Questions (FAQ)
Q: When I access the Email Client(s) form, I am getting the following message "From Email Address for your Organization isn't configured currently. Please contact your IT admin".
A: When creating a new email, the 'Send Email From' field under Mailing List is blank and missing an email address. To resolve this, please ask your CARMIS or IT admin to add an email under Email Account Setting (7010).
Q: Why am I unable to change the counsellor?
A: You cannot change the counsellor because this field is a system field and it cannot be changed.
Q: Why am I unable to select more than one email address in "Send Email From Field"?
A: If you only have one sender email option, you'll need to add another email to the list. Adding a new email requires administrative access. If you don't have this access, please ask your administrator to add the email.
Q: How can I make my Email Template available to my colleagues?
A: When saving an email template you will need to select who this template will be available to, by selecting "All Staff/User" it will make the template available to your colleagues.
Q: How can I reuse my email signatures?
A: You can reuse email signatures by creating a template with your email signature and all other necessary information and making new emails based off those templates.