
Sections:
How To Add A New NAARS Assessment To A Client
Step 1: Using the top navigation menu, navigate to Client > Client Profile (28).

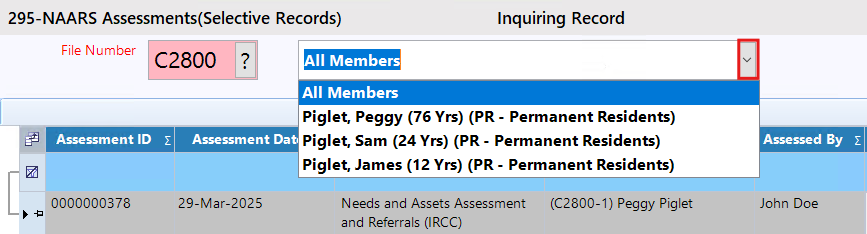
Step 2: Search for a client profile for which you would like to do a NAARS assessment on.
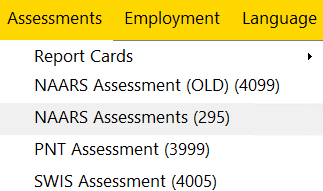
Step 3: Once you have selected a client, navigate to Assessments > NAARS Assessments (295). Please note: If your data is from before April 1, 2025, continue using 'NAARS Assessment (OLD) (4099).' For new data entered on or after April 1, 2025, use 'NAARS Assessment (295).'
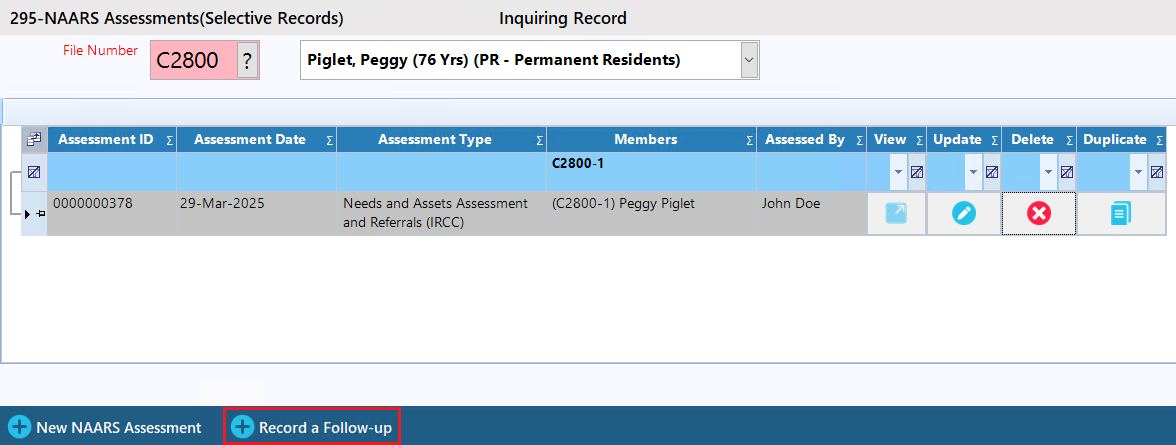
This will open a form listing any existing assessments, as shown below.
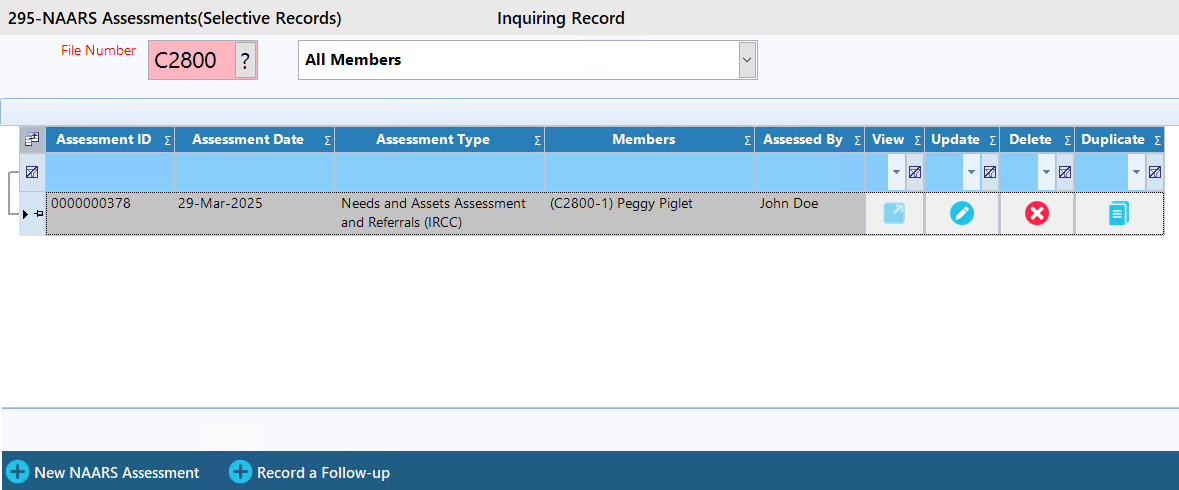
Step 4: From the bottom action bar, click on the 'New NAARS Assessment' button to make a new assessment. Once clicked a new window up will open.
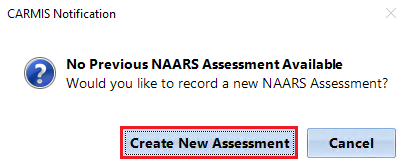
If your client does not have an existing assessment, then CARMIS will provide a pop-up, asking if you would like to create a new assessment. Click on the 'Create New Assessment' button.
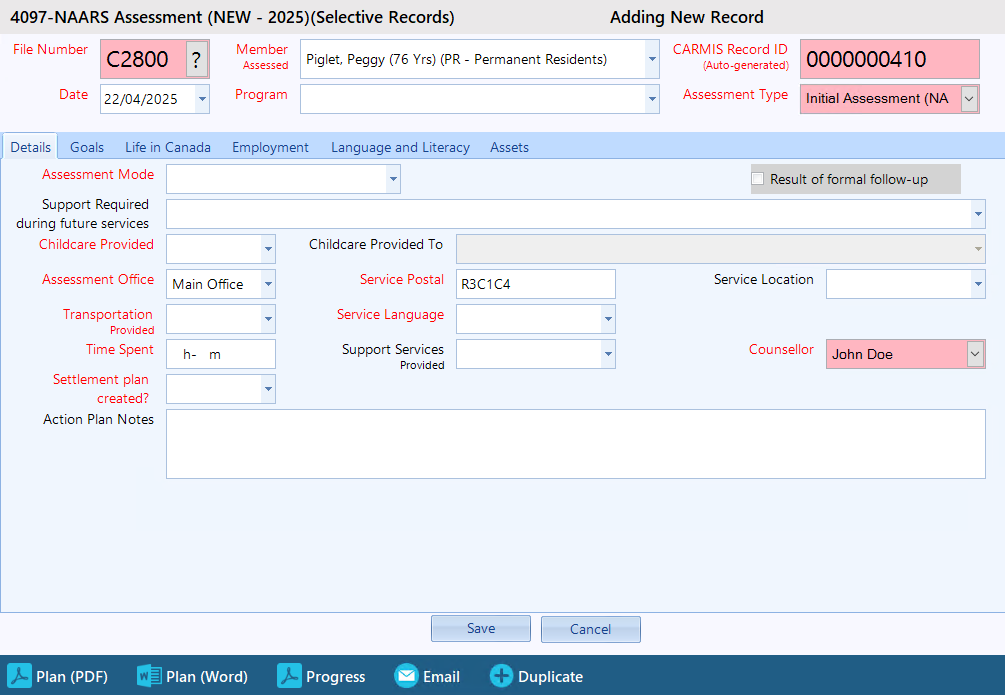
Step 5: Once clicked, a new window will open. You can now start entering data for the assessment.
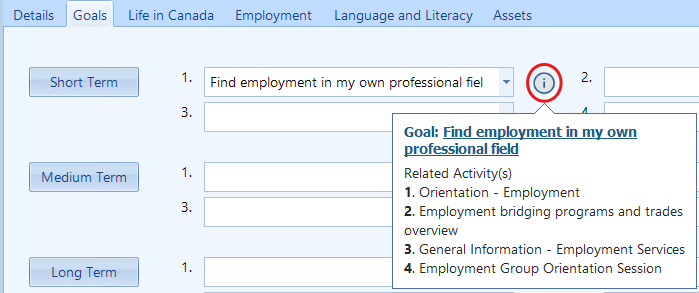
Goals
In this this tab you can structure goals based on the clients needs of the assessment process.
Please Note: If you don’t select a program, CARMIS will display a warning: 'Please select Program to add goals.' Make sure to select a program to define goals. If you’ve selected a program but don’t see any goals listed, you can add them under '655 - Agency Programs'.

Step 1: Click on the drop-down menus in the Short, Medium, or Long-Term sections and select your goal.
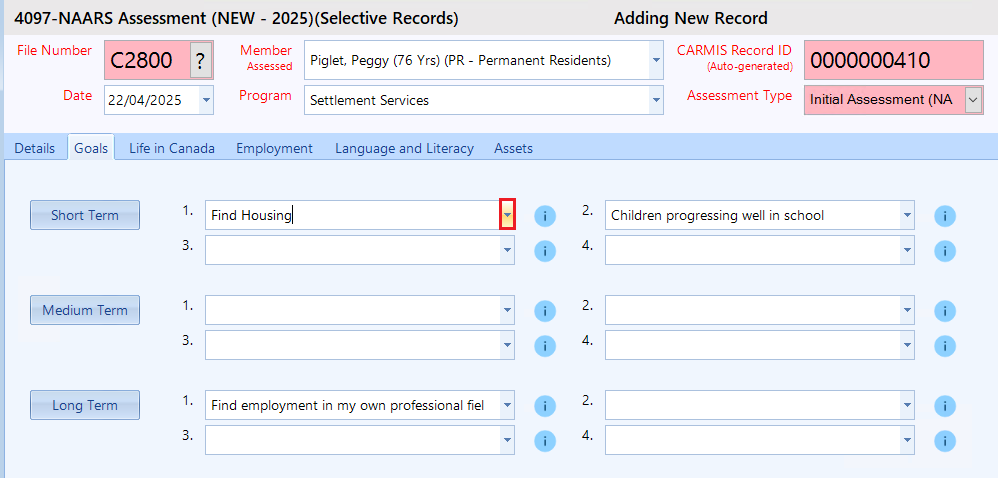
If your agency has multiple goals, click the Short, Medium, or Long 'Bulk Select Goal' buttons to open a window where you can select multiple goals at once for easier access.
Life In Canada / Employment / Language and Literacy
In these tabs you can identify the clients needs for life in Canada, Employment and Language and Literacy.
Step 1: Select the clients needs identified checkbox(s) and click on the drop down to select a referral as well.
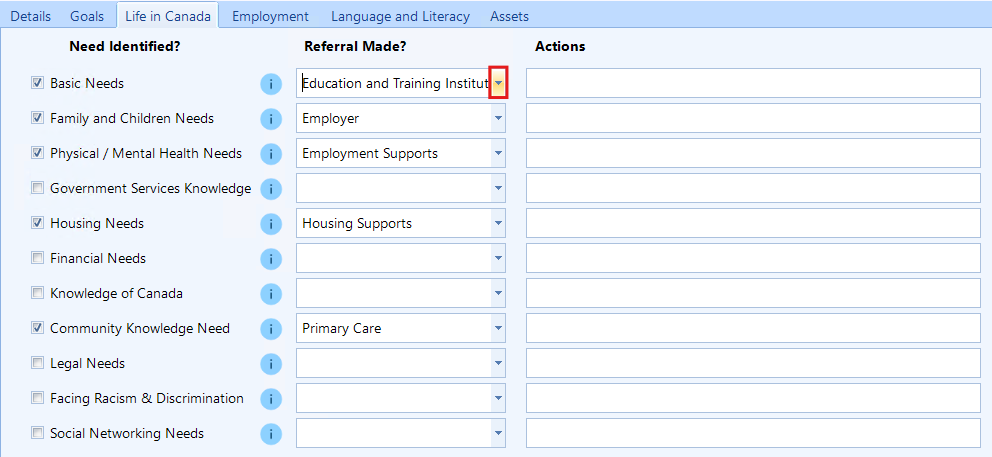
Referral Made: If you are referring a client then please select the referral using the drop down menu.
Actions: Actions field can be used to define how you will help the client, or what steps the client will need to take.
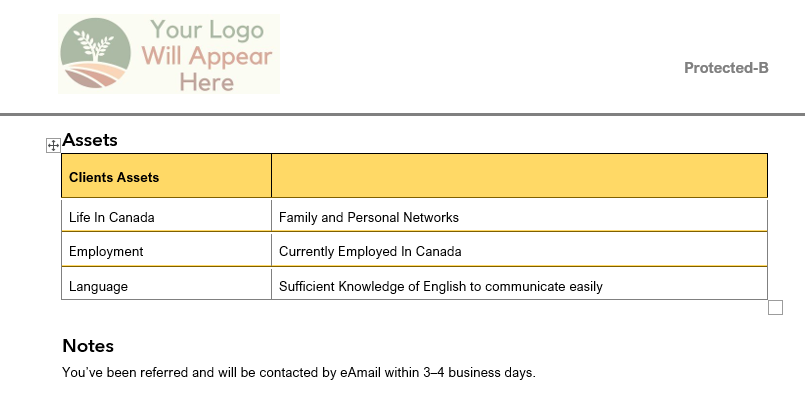
Assets:
Use this tab to identify if the client has any assets related to Life in Canada, Employment, or Language.
Step 1: Select the clients assets by clicking the drop down and clicking on the checkbox(s).

Step 6: After all data has been filled out, click on the 'Save' button to save your changes.
How To Update A NAARS Assessment
Step 1: Using the top navigation menu, navigate to the Assessments > NAARS Assessments (295).
Step 2: Click on the 'Search' button located on the toolbar and search for a client you would like to update the NAARS Assessment of.
Step 3: Once you have selected a client click on the icon in the 'Update' row of the grid.

Step 4: Once clicked, a new window will open. You can now start updating the assessment.
Step 5: Once you have made you change, click on the 'Save' button to save your changes.
How To Delete A NAARS Assessment
Please Note: You cannot delete an assessment if it has been submitted to iCARE. If the assessment hasn't been submitted, please proceed with the steps below.
Step 1: Using the top navigation menu, navigate to the Assessments > NAARS Assessments (295).
Step 2: Click on the 'Search' button located on the toolbar and search for a client you would like to update the NAARS Assessment of.
Step 3: Once you have selected a client click on the icon in the 'Delete' row of the grid.

Please note: If you have submitted the assessment into iCARE then the delete button will instead show a lock icon, indicating that the assessment has been locked.

Step 4: Once clicked, a pop up will show, asking if you would like to delete the record, select 'Yes'.
How To do A NAARS follow-up Assessment
Step 1: Using the top navigation menu, navigate to the Assessments > NAARS Assessments (295).
Step 2: Click on the 'Search' button located on the toolbar and search for a client you would like to create a follow up assessment of.
Step 3: Once you have selected a client, click in the bottom action bar 'Record A Follow-up' button.
Step 4: Once clicked, a new window will open and you can now start entering data for the follow up assessment. Please note: You will not be able to select the client's needs again. Additionally, the 'Progress Summary' drop-down menu will replace 'Settlement plan created' and the Assessment Type will be set to 'Formal Follow-up'
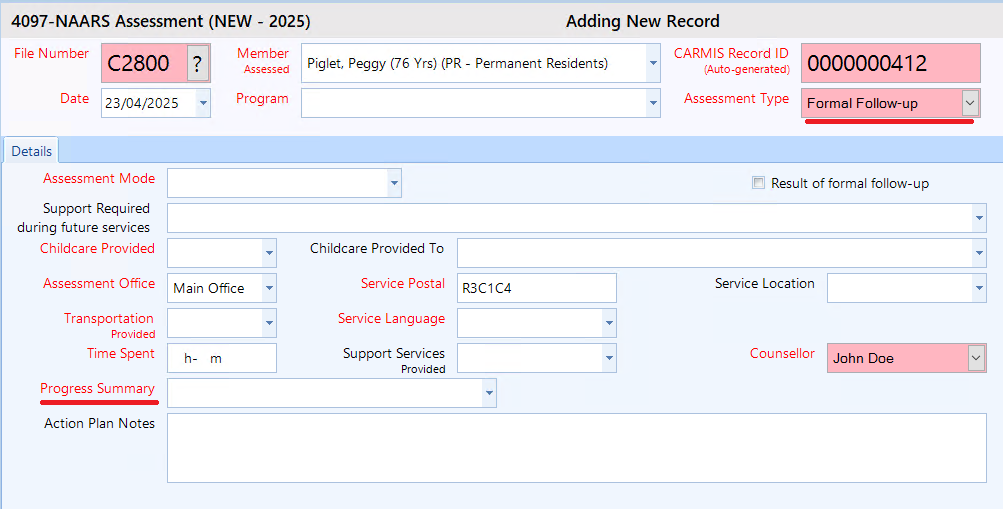
You can also check the box 'Result of formal follow-up' to indicate if this client needs another re-assessment.
Step 5: Once you have made you change, click on the 'Save' button to save your changes.
How To Duplicate NAARS Assessment Record
Step 1: Using the top navigation menu, navigate to the Assessments > NAARS Assessments (295).
Step 2: Click on the 'Search' button located on the toolbar and search for a client you would like to create a follow up assessment of.
Step 3: Once you have selected a client, click on the icon in the 'Duplicate' row of the grid.

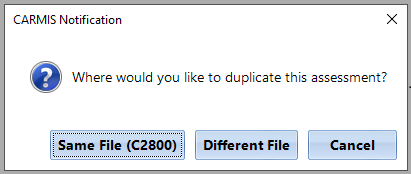
Step 4: Once clicked, a pop up will appear. It will ask if you would like to duplicate this assessment.
Same File: If you are doing a reassessment of the client, then select 'Same File (#FileNumber)'. This will copy all data entered into the new re-assessment record.
Different File: Clicking this button will copy the assessment to another client’s profile. After clicking 'Different File', select the new client by clicking the '?' icon next to the client selection field.
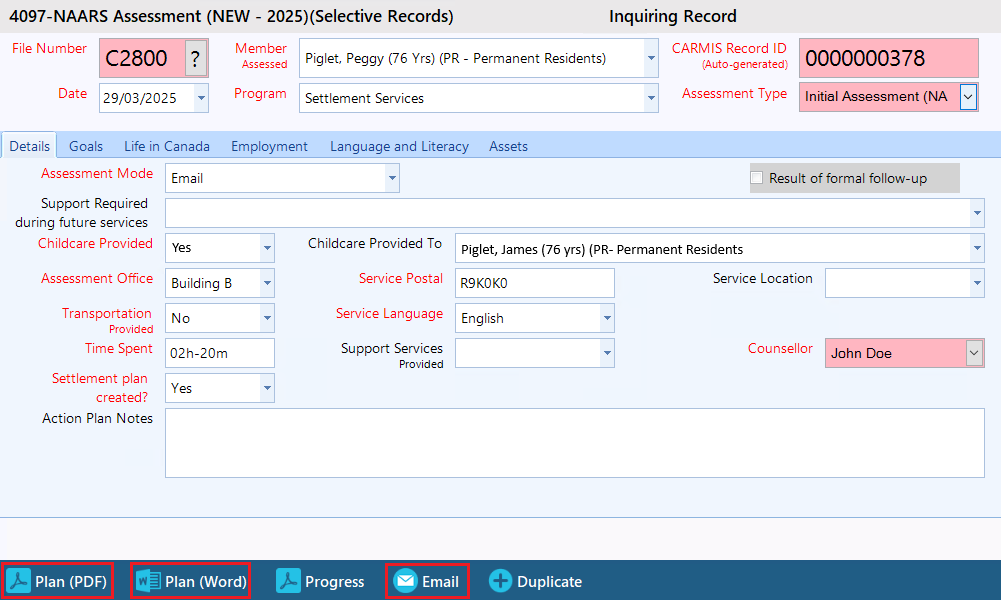
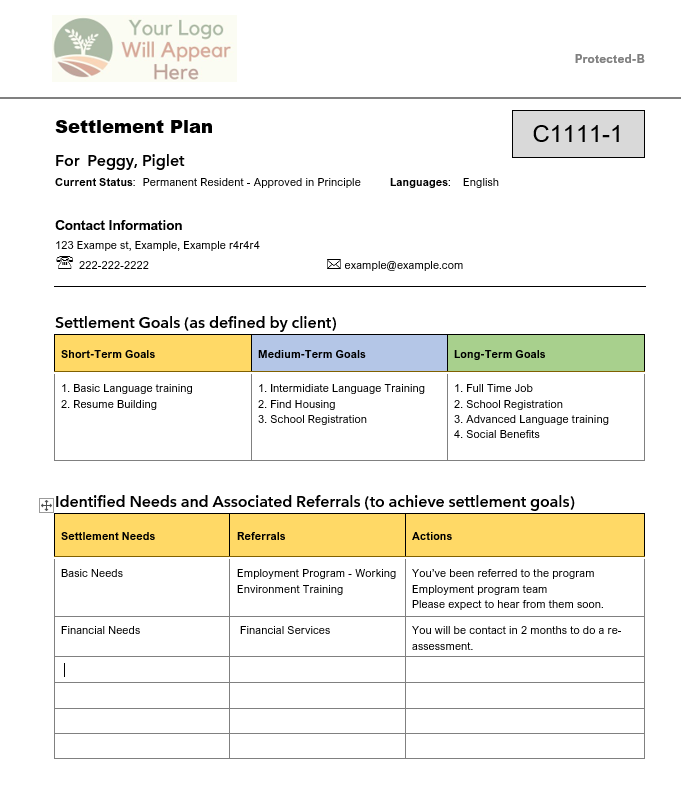
Downloading / Printing Action Plan Documents
After you have saved the NAARS assessment you can make printable copies of the assessment. To do so, click on either 'Plan (PDF)' or 'Plan (Word)' or 'Email' from the bottom action bar.
Print Action Plan (PDF) & Print Action Plan (Word)
Clicking either of these buttons will download a local copy to your computer. This wont affect CARMIS. Below is a example document download from NAARS assessment record.
Email Action Plan (PDF)
Clicking this button will setup a email inside CARMIS with the attached action plan PDF. If you would like to learn more about emailing within CARMIS, then check out our article on: How to send emails within CARMIS.