
There are essentially two methods to onboard with the CARMIS client, that is, by using the desktop application or by using the cloud-based web application. This article will assist you in onboarding with CARMIS if you are using Mac. If you would like to use and onboard with CARMIS client via the web, please follow the article: How to access CARMIS using a browser
Step 1
The first and foremost step of onboarding with CARMIS, as a Mac user, is to download the CARMIS client. To achieve this, please follow the link Client Installation File
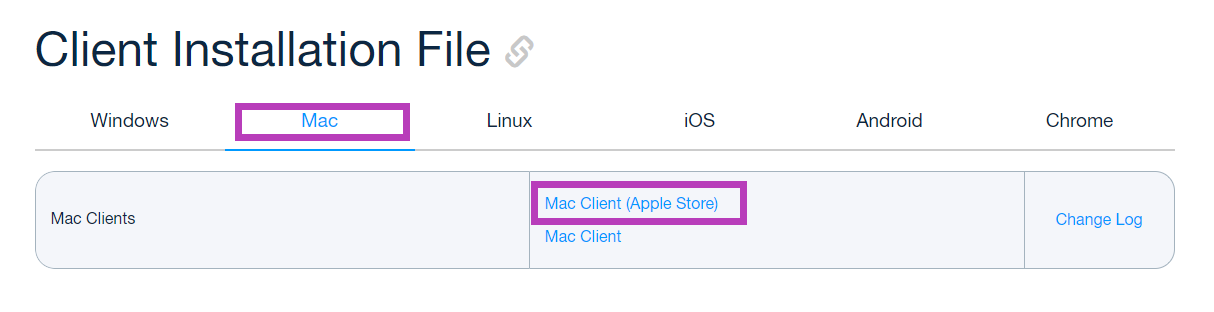
Step 2
This link will bring you to the “Parallels Client Installation” screen. Next, click on the Mac tab and then click on Mac Client (Apple Store).
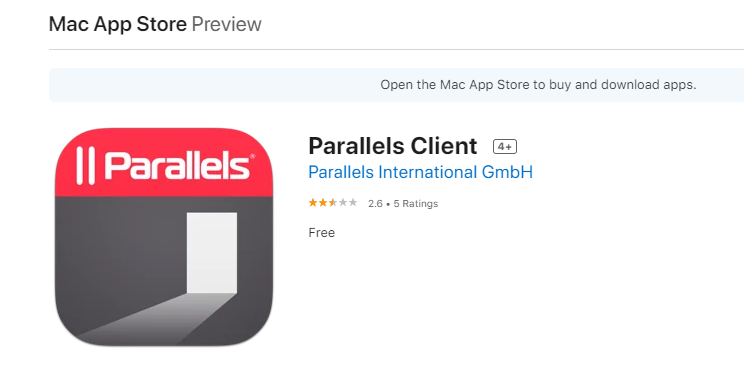
Step 3
Once you click on the link, you will be redirected to the Apple App Store. A pop-up box might appear asking to open the link in the App Store. Click “Open App Store”. Download Parallels Client.
Step 4
Once the download is complete, open the app. You can find the app by opening the Finder app and clicking on the Applications tab from the options on the right.
Step 5
The Parallels Client should now launch on your Mac, and you should be prompted to add a new connection.
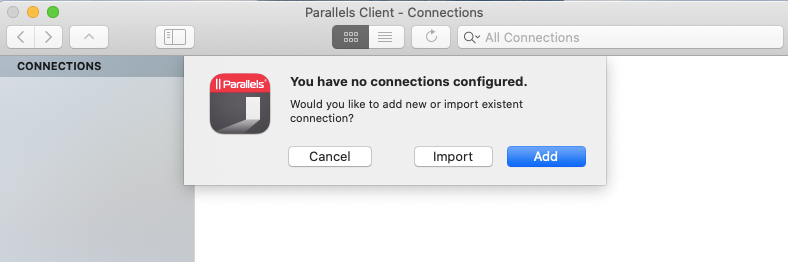
Click “Add” to create a new connection.
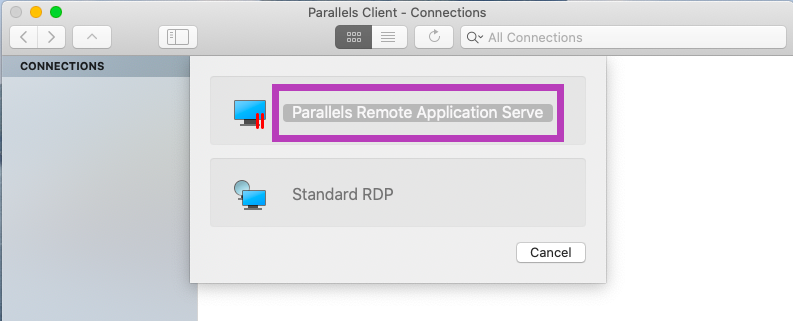
Step 6
A second screen will appear, click on “Parallels Remote Application Serve” to continue the installation.
Step 7
In the dialog box,
- Set the “Server” to “cloud.carmis.ca”
- Set the “Connection Mode” to “Gateway SSL Mode”
- (Optional) Set a friendly name for your connection.
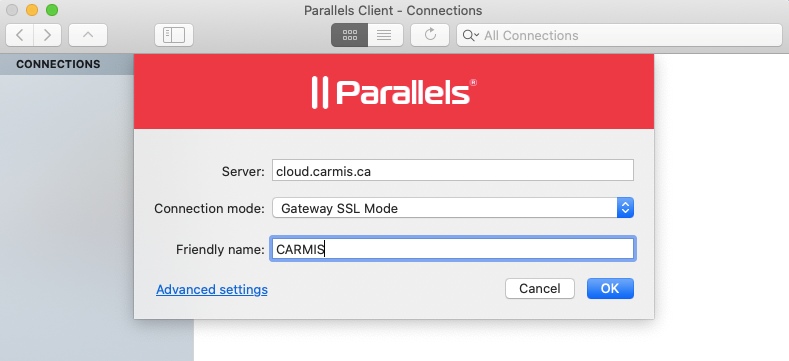
Click “OK” to continue to the Log In screen.
Step 8
Next, the Log In screen will pop up where you can enter your username and password associated with the CARMIS Client. (For login credentials, look into the email received from CARMIS)
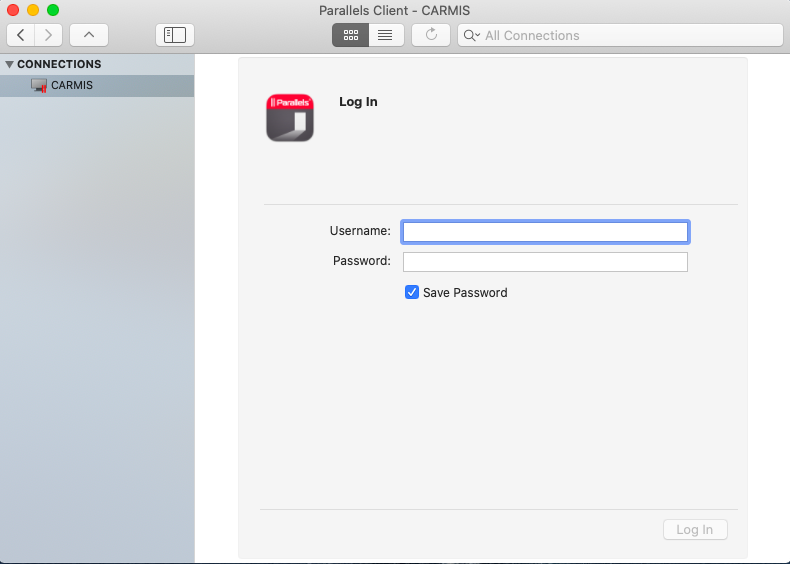
Click “Log In” to create a connection.
Step 9
To complete the creating a connection, you will also need to grant Parallels Client access to work with local files in your user folder.
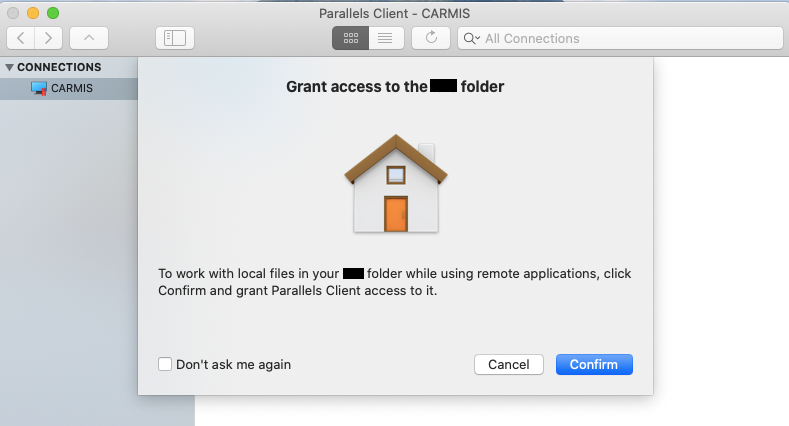
Click “Confirm” to open your user folder.
Step 10
Another small window will appear showing the local files in your user folder.

Click “Open” to grant access.
Step 11
Once access has been granted to Parallels Client, you will see a dialog box confirming the access.
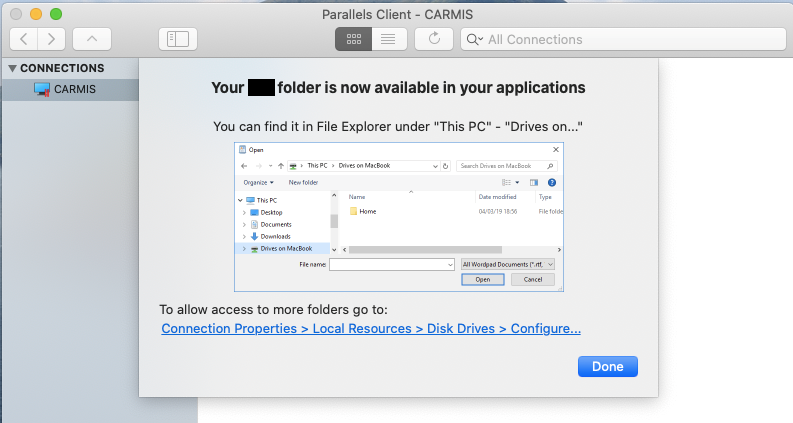
Click “Done” to close the dialog box.
Step 12
You will then see “CARMIS” text on the left sidebar. Right-click on the text and click on “Connect”. This will complete the process to create a connection.
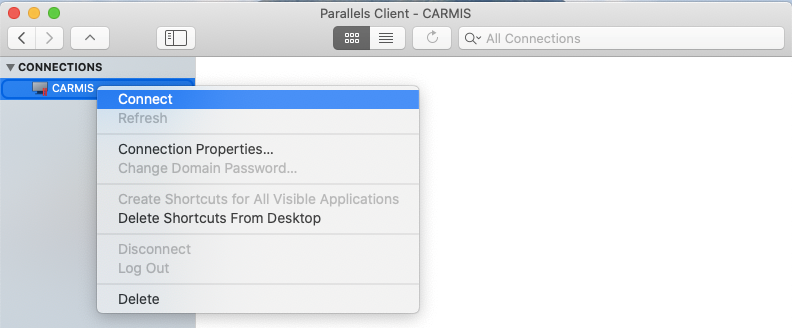
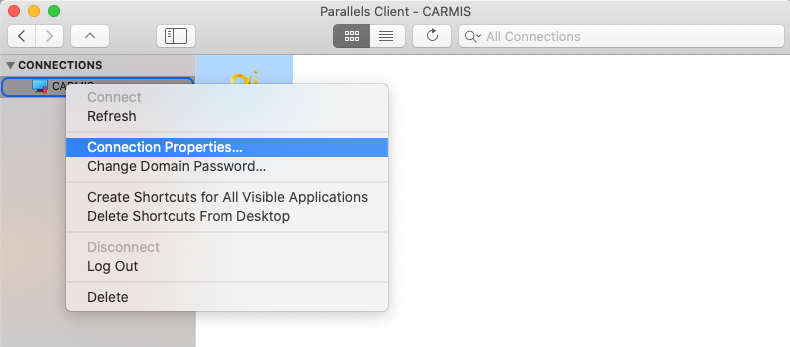
Step 13
Once the connection is created, right-click on the “CARMIS” text, on the left sidebar again, and click on “Connection Properties...”.
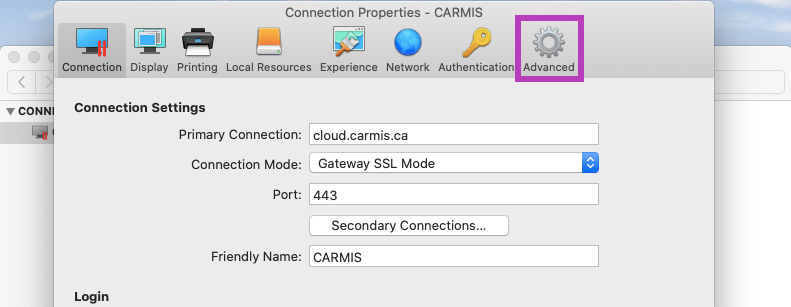
Step 14
The Connection Properties window will pop up on your screen. On the top bar, click on the “Advanced” tab.
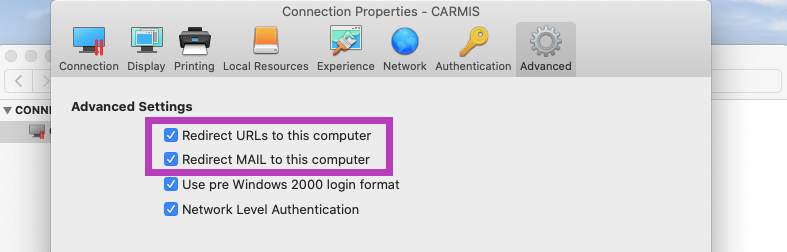
Step 15
Select two options that are highlighted in the screenshot and click “OK”.
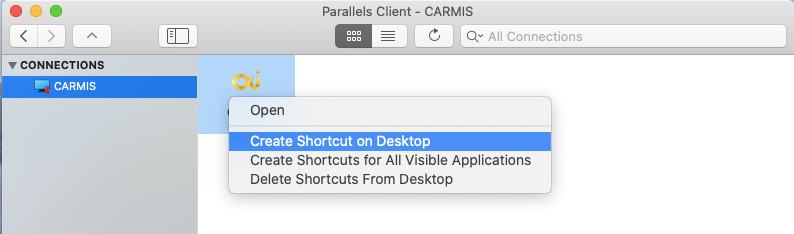
Step 16
To create a shortcut on your desktop, right-click on the CARMIS icon on the right and click “Create Shortcut on Desktop”.
Now, a shortcut to CARMIS has been created on your desktop.
Step 17
Finally, double click on the CARMIS icon on your desktop and log in to CARMIS using the same credentials received through email.