As clients receive services over time, their Canadian immigration status may change, impacting their eligibility under different funders. CARMIS automates the process to manage client's changing immigration statuses with the organization. CARMIS also provides organizations more control to manage clients' historical statuses.
Adding a New Current Status in Canada
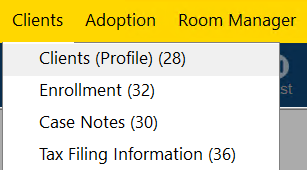
Step 1: Using the top navigation menu, navigate to Clients > Client Profile (28).


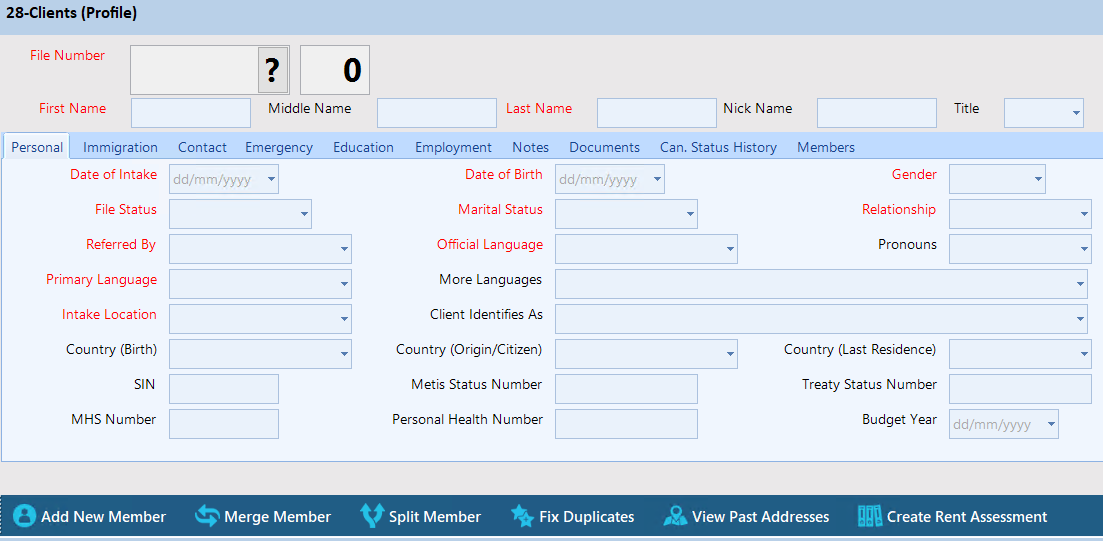
Step 2: Search for a client profile using the "Search" button from the tool bar. If you would like to learn more about how to search for a client, please see our article on How to search for an existing client.

Step 3: Once you have selected the client profile, click the "Update" button from the tool bar.

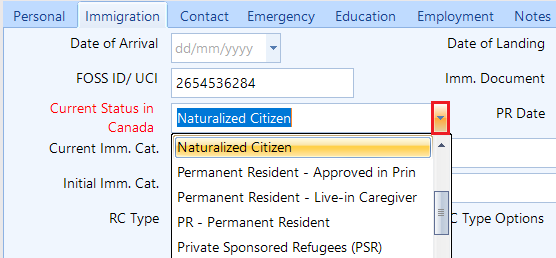
Step 4: Navigate to the "Immigration" tab.

Step 5: Under the field "Current Status in Canada" please select the new current status in Canada using the drop down menu.

Please Note: Some Canadian statuses require you to enter additional information, for example FOSS ID/UCI.
Step 6: Once you have selected the new current Canadian status, click on the "Save" button located at the bottom of the window.

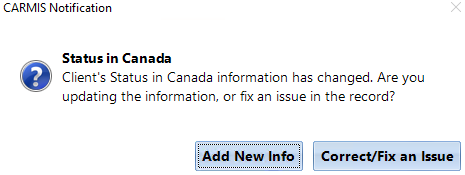
Step 7: After clicking the "Save" button, a pop-up will appear before applying the changes. You will have two options to choose from:

Add New Info: Updates the client's status to a newly selected status and updates the history of the clients journey.
Correct/Fix an Issue: Updates the client’s status without creating a new entry in the history of the clients journey.
After choosing the appropriate option, you will able to view the changes in the "Can. Status History" tab. Below is an example of selecting the "Add New Info" button.

Making Changes To A Previous Canadian Status (Can. Status History tab)
The "Can. Status History" tab allows you to view the history of a clients journey. If any changes are required, you have the ability to make those changes.
To begin making changes to a clients history, please enter "Update" mode and find an appropriate spot to make the changes.

The previous statuses are sorted by the "Effective" date, with the latest date at the top and the oldest date at the bottom.
Once you have made your desired changes, click on the "Save" button located at the bottom of the window. This will apply the changes to the history of the clients journey.
Frequently Asked Questions (FAQs)
Q: How can I delete or clear previous statuses?
A: To delete a previous status, highlight the text of the previous status you would like to remove, then hit the "backspace" key on your keyboard or the "delete" key.

Q: How are the historical Canadian Statuses used?
A: As services (group, one-on-one, or assessments) are recorded, CARMIS uses the client's status in Canada on the service date to classify the service under the correct funding category—such as provincial, IRCC, or other funders. This is crucial to ensure accurate reporting and compliance with each funder's requirements.
Q: How does CARMIS organize the previous status in Canada?
A: CARMIS will automatically organize the previous status field list based on date descending.
Q: What will happen if I remove the current status in Canada?
A: If you decide to remove or clear the current status in Canada, CARMIS will automatically add the previous status in Canada in place of current status in Canada.
Q: What does "Effective" mean in the date field in "Can. Status History" tab
A: The "Effective Date" refers to the date on which IRCC (Immigration, Refugees and Citizenship Canada) issued the client's Canadian status.
