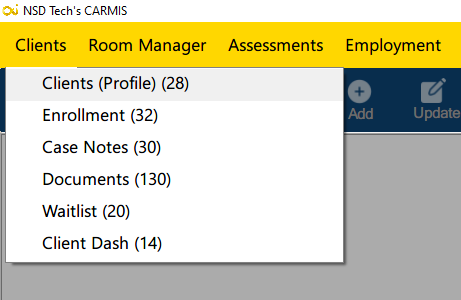
Step 1: To get started with adding a new client, navigate to Clients > Clients (28) on the yellow navigation bar at the top.

Once open, you will see the form below. The red labels on the form indicate mandatory fields while the black labels indicate optional fields. Based on your agency’s configuration some fields may be hidden or non-mandatory

Step 2: (Optional) Before creating a new profile, you may want to search for the client to ensure a profile for them does not already exist.
Step 3: Certain toolbar buttons will be highlighted depending on your user role. To proceed with adding the client, simply click “Add” from the dark blue bar at the top.

Step 4: When adding a new client, a File Number will be automatically generated. This is a unique number used by CARMIS to identify a particular client and cannot be changed.

Step 5: Enter the client information as needed in the fields available and select options from the dropdowns, such as language and country of birth, that have been predefined for your agency.
Step 6: Navigate to different tabs of the form to enter more information about the client. These tabs include:
- Immigration: For information such as status in Canada, date of arrival, and current/past immigration categories.
- Contact: Contact information and physical address
- Emergency: Emergency contact information
- Education: Education and language skills information.</li
- Employment: Current job status and employment information.
- Notes: Additional information such as high need categories, consents provided, and remarks.
- Documents: You can upload documents to the client profile.
- Can. Status History: You can view the clients previous Canadian Status history.
- Members: Shows all members of the family file. Double-clicking a member in this tab will open their client profile.

Step 8: Once all the client information has been entered, click the “Save” button, located at the bottom center of the form. Cancelling or exiting the form without saving will result in all the entered information being lost.

