
Using Mark Attendance will allow you to mark attendance for students in a course.
Marking Attendance
Step 1: Using the top navigation menu, navigate to Language > Mark Attendance (LINC) (855) form.
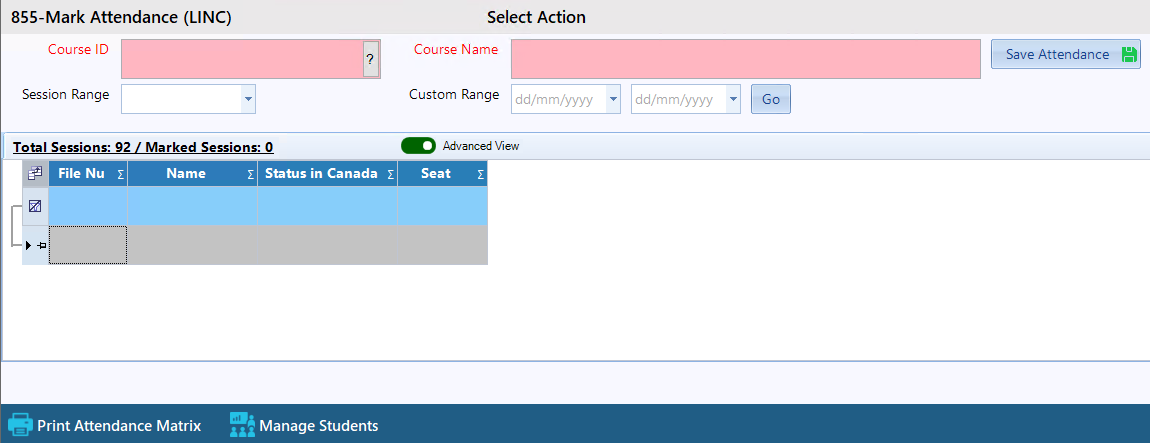
This will open the Mark Attendance form shown below.
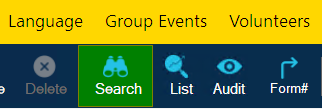
Step 2: Click on the 'Search' button in the top toolbar.
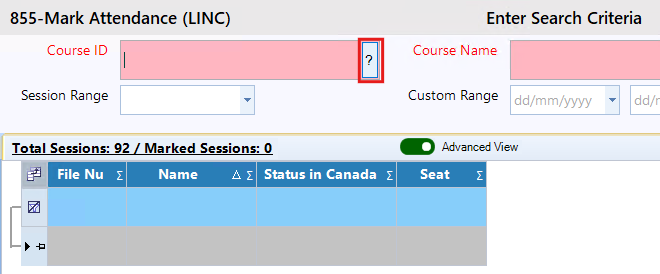
Step 3: Click on the '?' button in the 'Course ID' field and select a course containing registered students you would like to mark.
Step 4: After selecting a course, the Mark Attendance window will appear as shown below.
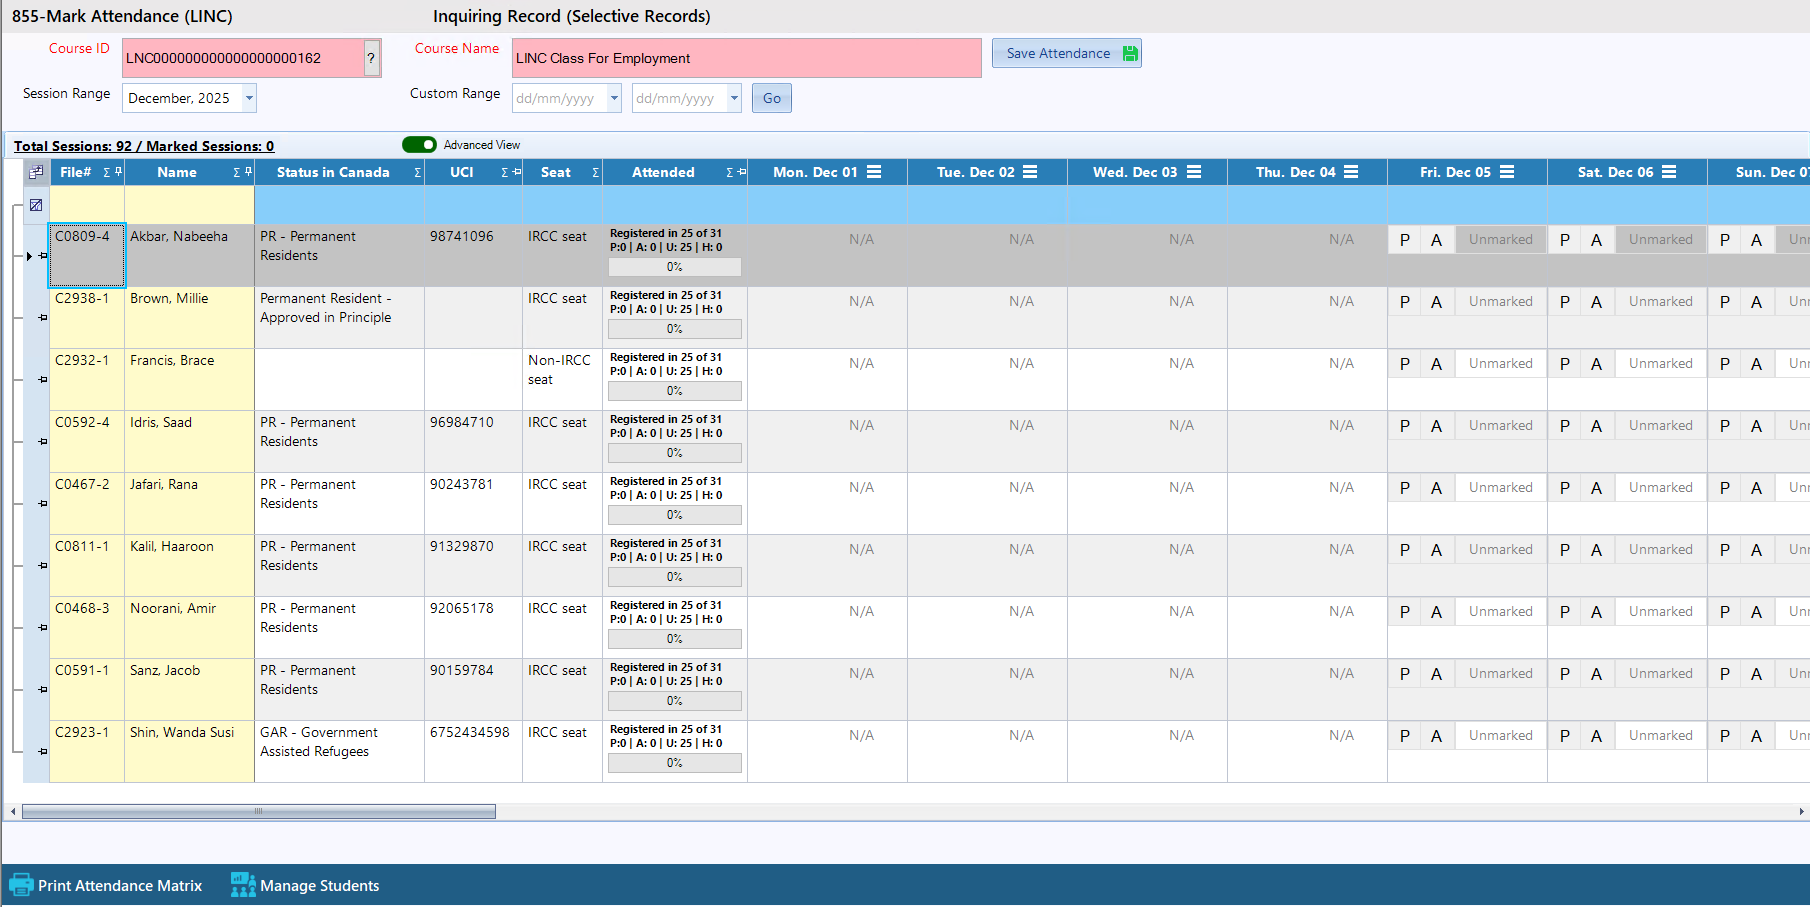
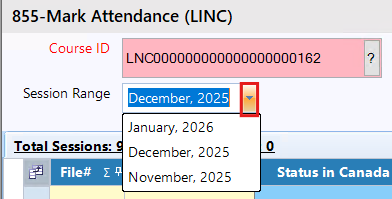
You can view various session dates by using the 'Session Range' field.
Marking Attendance As 'Present' or 'Absent' with Reasoning
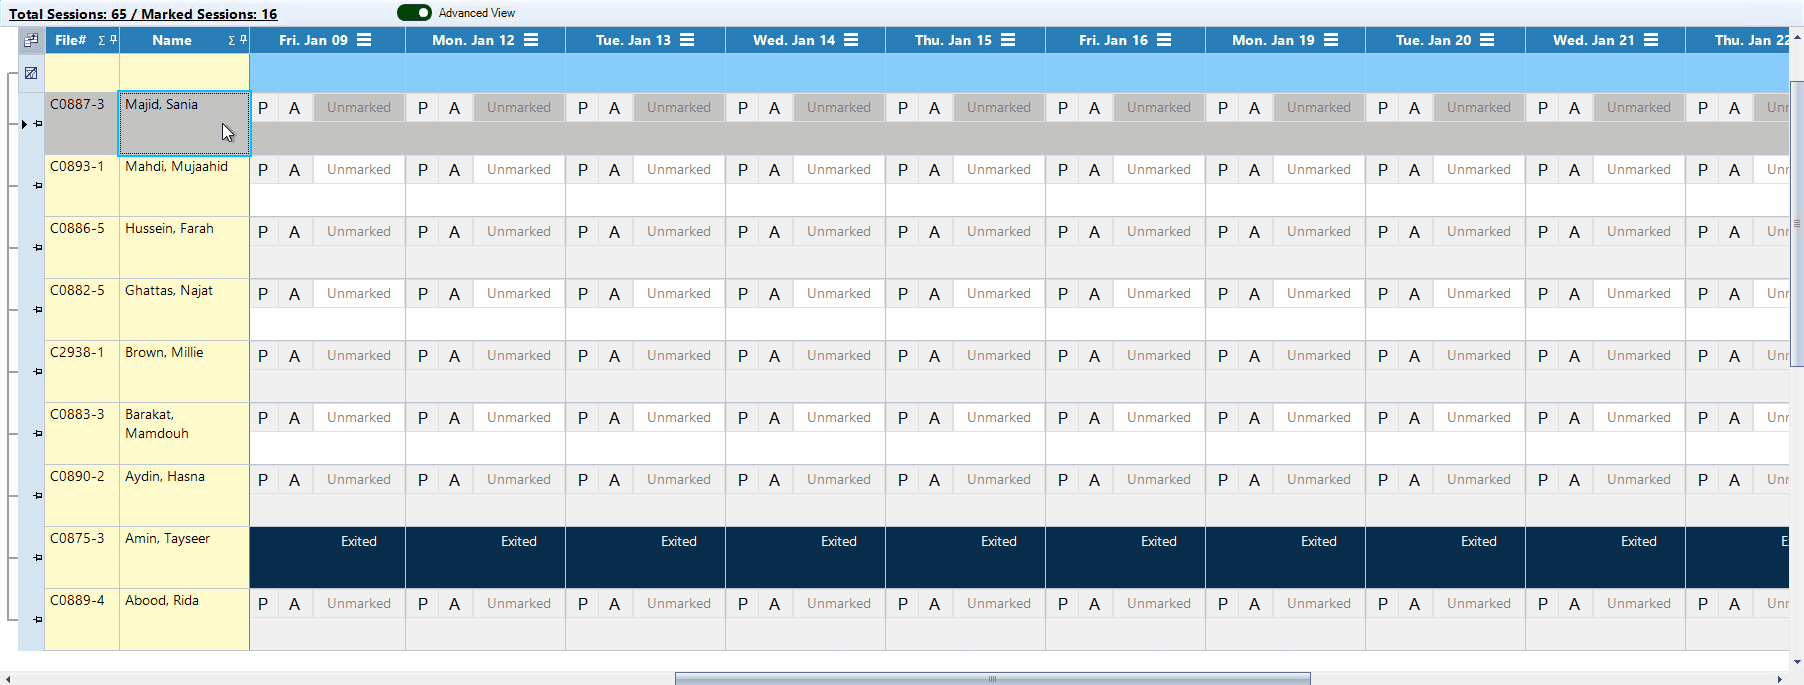
To mark a student as 'Present' or 'Absent', go to their row and double-click the 'P' or 'A' button under the desired date column. The button will turn green for 'Present' and red for 'Absent' to indicate the selection.
Once a you marked the attendance, you can also select a reason as well. For example, if a student attended a class, but was late, you can select 'P' (Present) and then select the reason "Arrived Late". Vis versa for any absent reasoning.

If all students are present or absent for a session, you don’t need to mark each one individually. Simply click the 'Mark All Present' or 'Mark All Absent' in the menu. Selecting 'Clear Attendance' will unmark all attendance for that column.
Step 5: Once you have entered the attendance, click on the 'Save Attendance' button to save attendance.
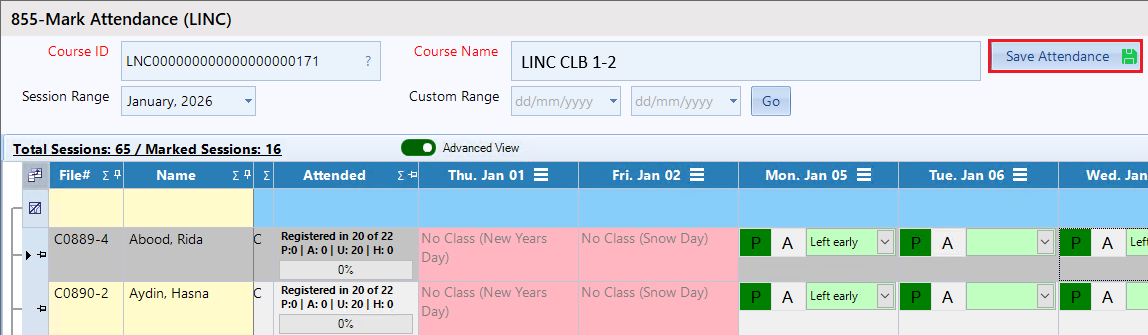
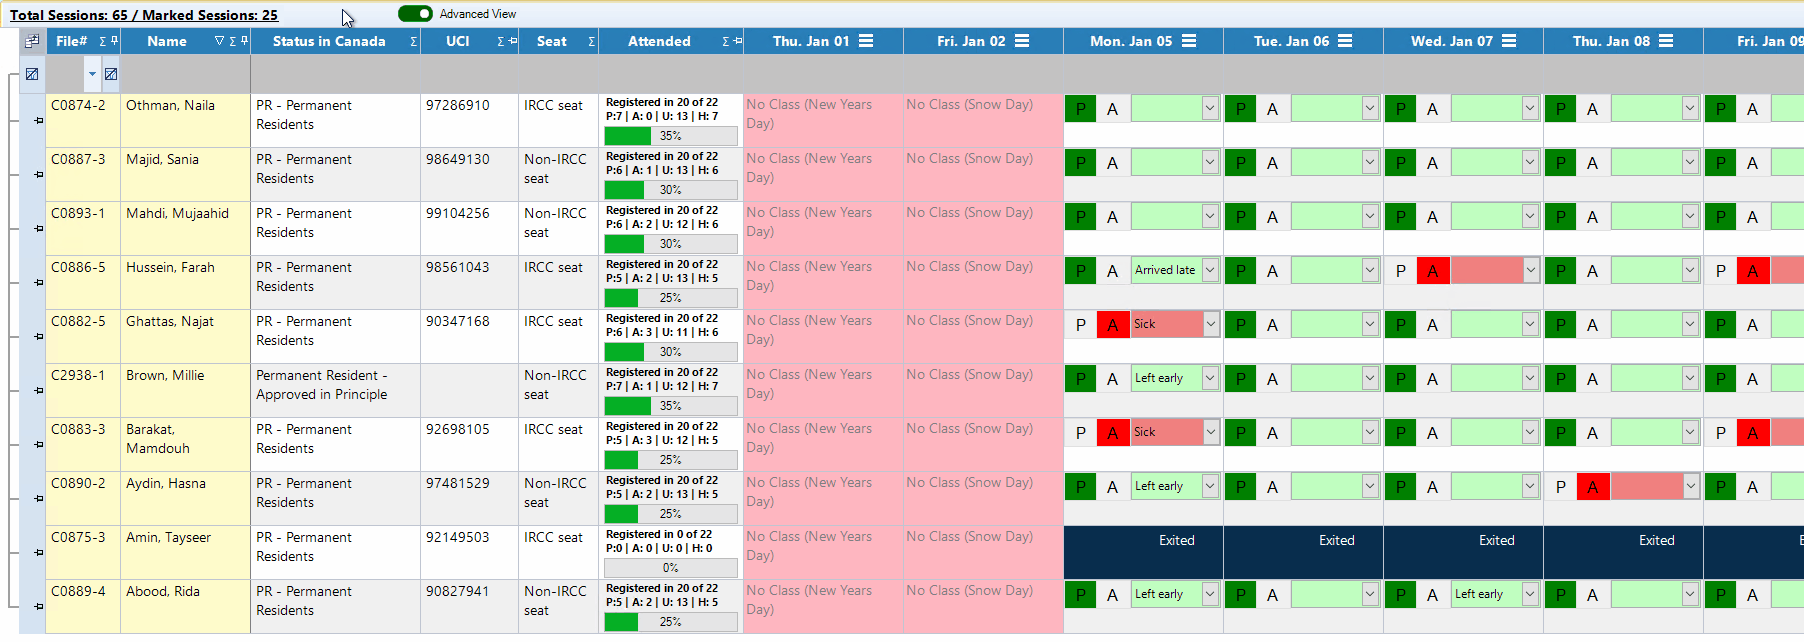
Once you have saved the attendance, under the 'Attended' column, the students attendance information will be updated.
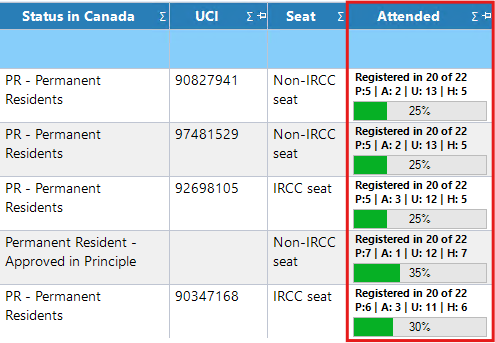
Detailed view of the 'Attended (Month)' column:
- Registered in - Number of sessions
- P – Number of Present days
- A – Number of Absent days
- U – Total number of sessions marked
- H – Attended Hours
- Progress: (Percent / Registered)%
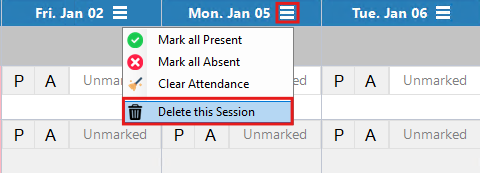
Deleting A Session (REquires Delete Access)
If you want to delete a session, click on the 3 bar icon next to the date, then click 'Delete This Session'. If you do not have delete access, please contact your administrator.
Once clicked, CARMIS will provide you a prompt asking the delete reason for the selected session. In the field 'Deletion Reason', enter the reason for deletion.
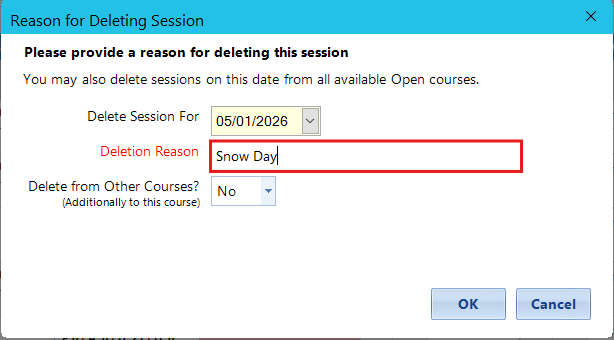
If you want to delete this session date for all class in the CARMIS system, then on the field 'Delete from Other Courses?' select 'Yes'. By default it will be selected 'No'.

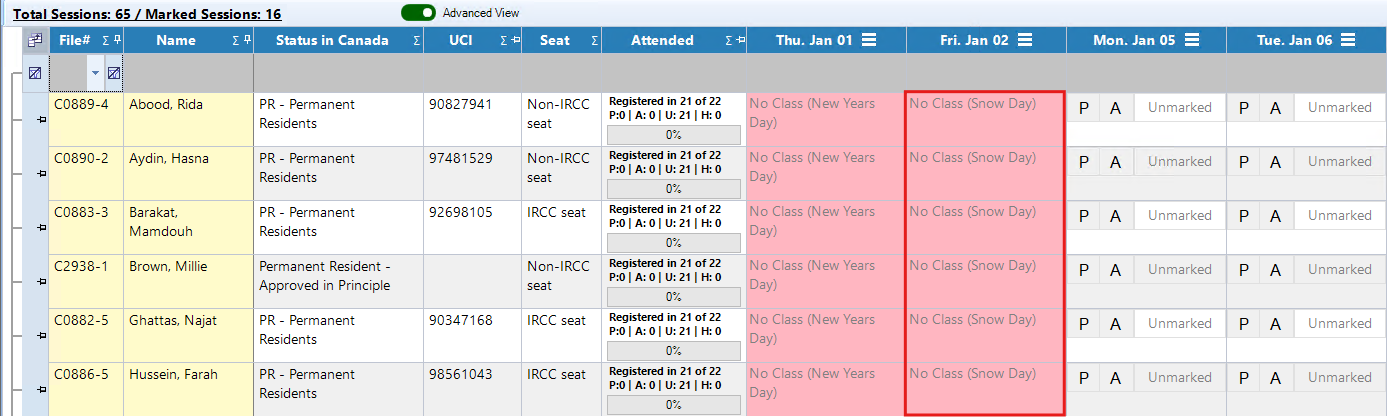
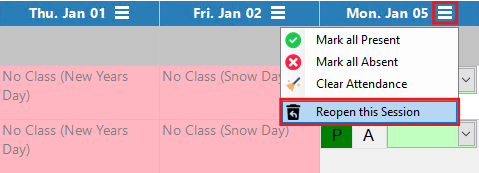
Reopen A Session
If you want to reopen a session, click on the 3 bar icon next to the date, then click 'Reopen This Session' button.
Once clicked, CARMIS will provide you a prompt confirming the selected date to be reopened. Click 'Yes' to reopen the session.
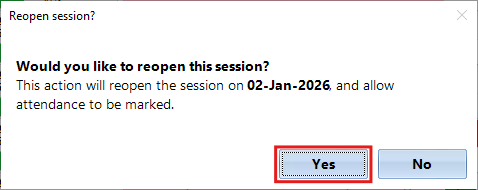
The attendance will update and the session will become unlocked, allowing you to mark attendance.
Print Attendance Matrix: Clicking the 'Print Attendance Matrix' will export an Excel file containing the attendance.
Manage Students: Clicking the 'Manage Students' button will open the 'Manage Students (851)' form. If you would like to learn how to register a student, then check out our article on: How to Manage Students.
Changing Attendance View
Frequently Asked Questions (FAQs)
Q: I am not able to mark attendance for a exited student?
A: If a student is exited from the course, then the attendance for any remaining sessions becomes locked.
Q: How can I manage the present and absent reasons?
A: You can manage the present reasons by going to form 'LINC - Present Reasons (532)' and to manage absent reasons, you can go to form 'Event Attendance Notes / Absence Reasons (524)'. If these forms are not available to you, please contact your organizations CARMIS Administrator.