
How To Managing Follow Ups and Appointments Efficiently
Step 1: Using the top navigation menu, click on the 'Calendar' button. If you do not see the 'Calendar' button, please contact support@nsdtech.com or system administrator to enable it through security groups.

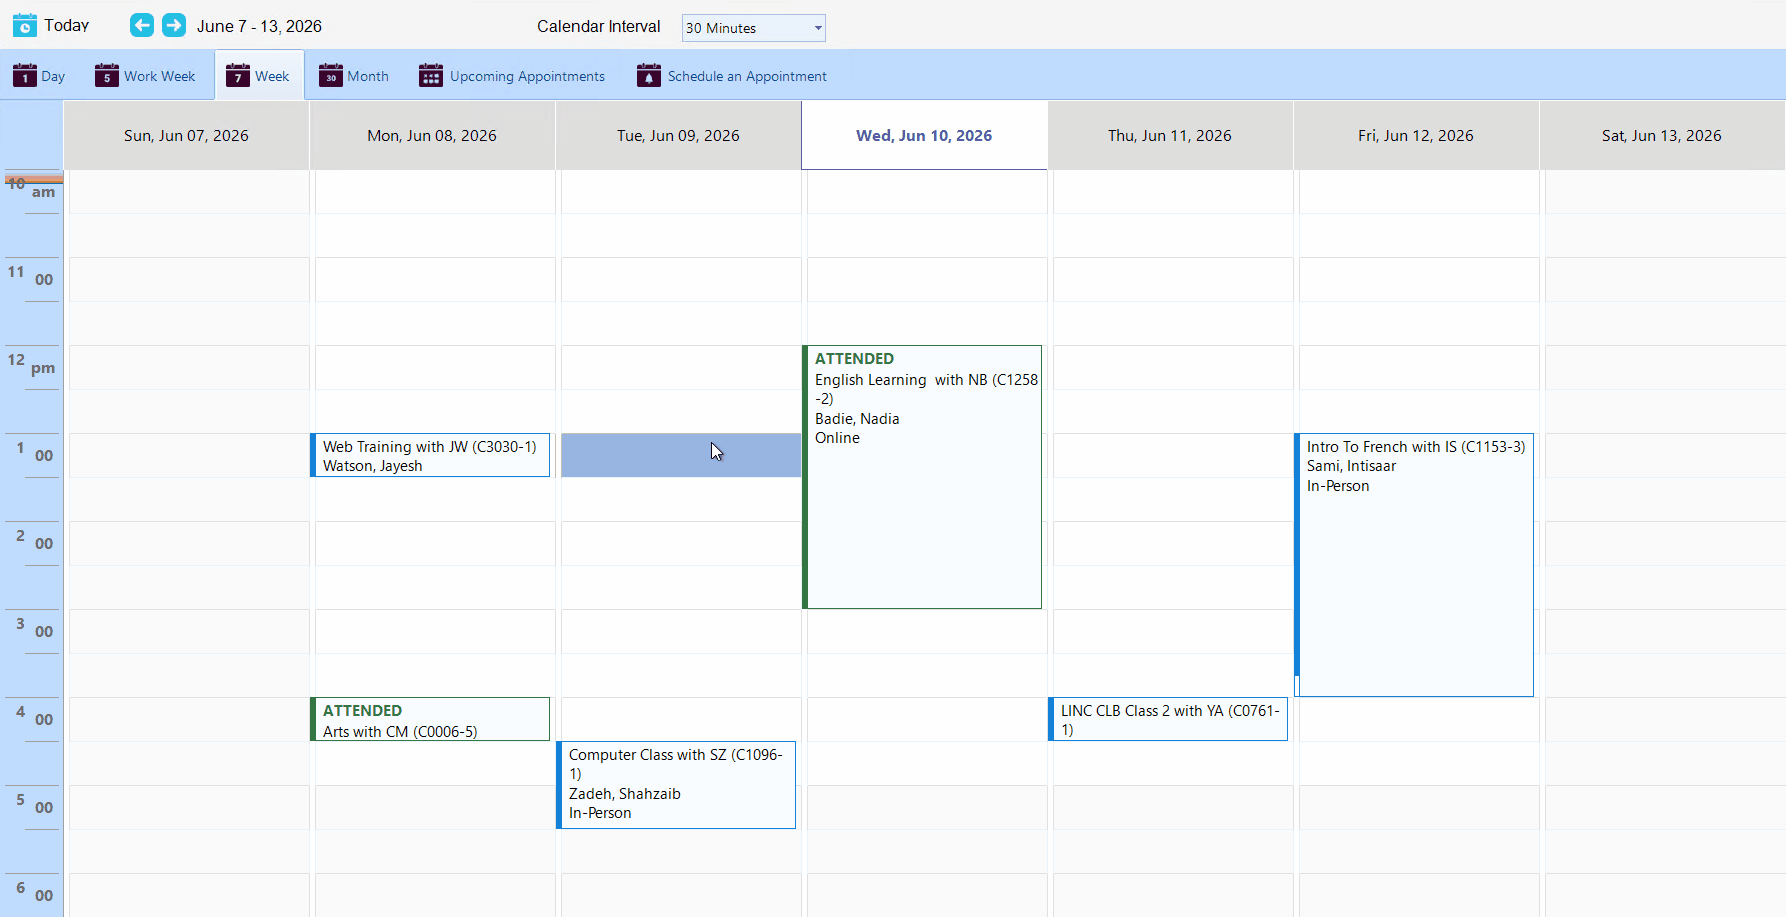
This will open the Calendar shown below.

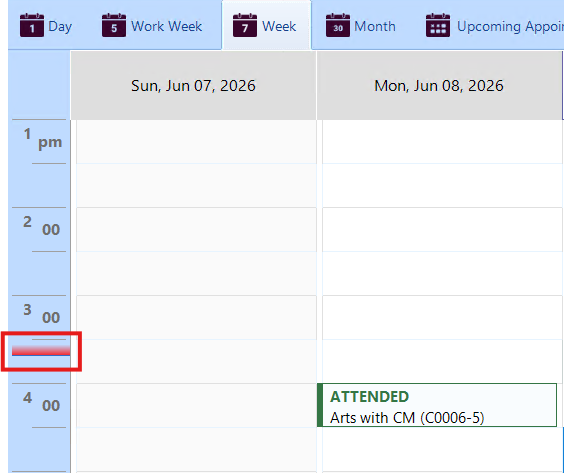
You can change the view of the calendar by selecting either 'day', 'work week', 'week' or 'month'.

Navigate dates using '<--' or '-->' buttons, depending on your selected view.

You can adjust the time interval by selecting an option from the 'Calendar Interval' dropdown. CARMIS will remember your last selected interval.
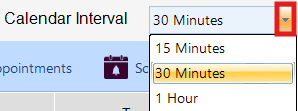
The red line on the time intervals indicates the current time and updates every second.
How To Schedule Follow Ups With Clients and Partners
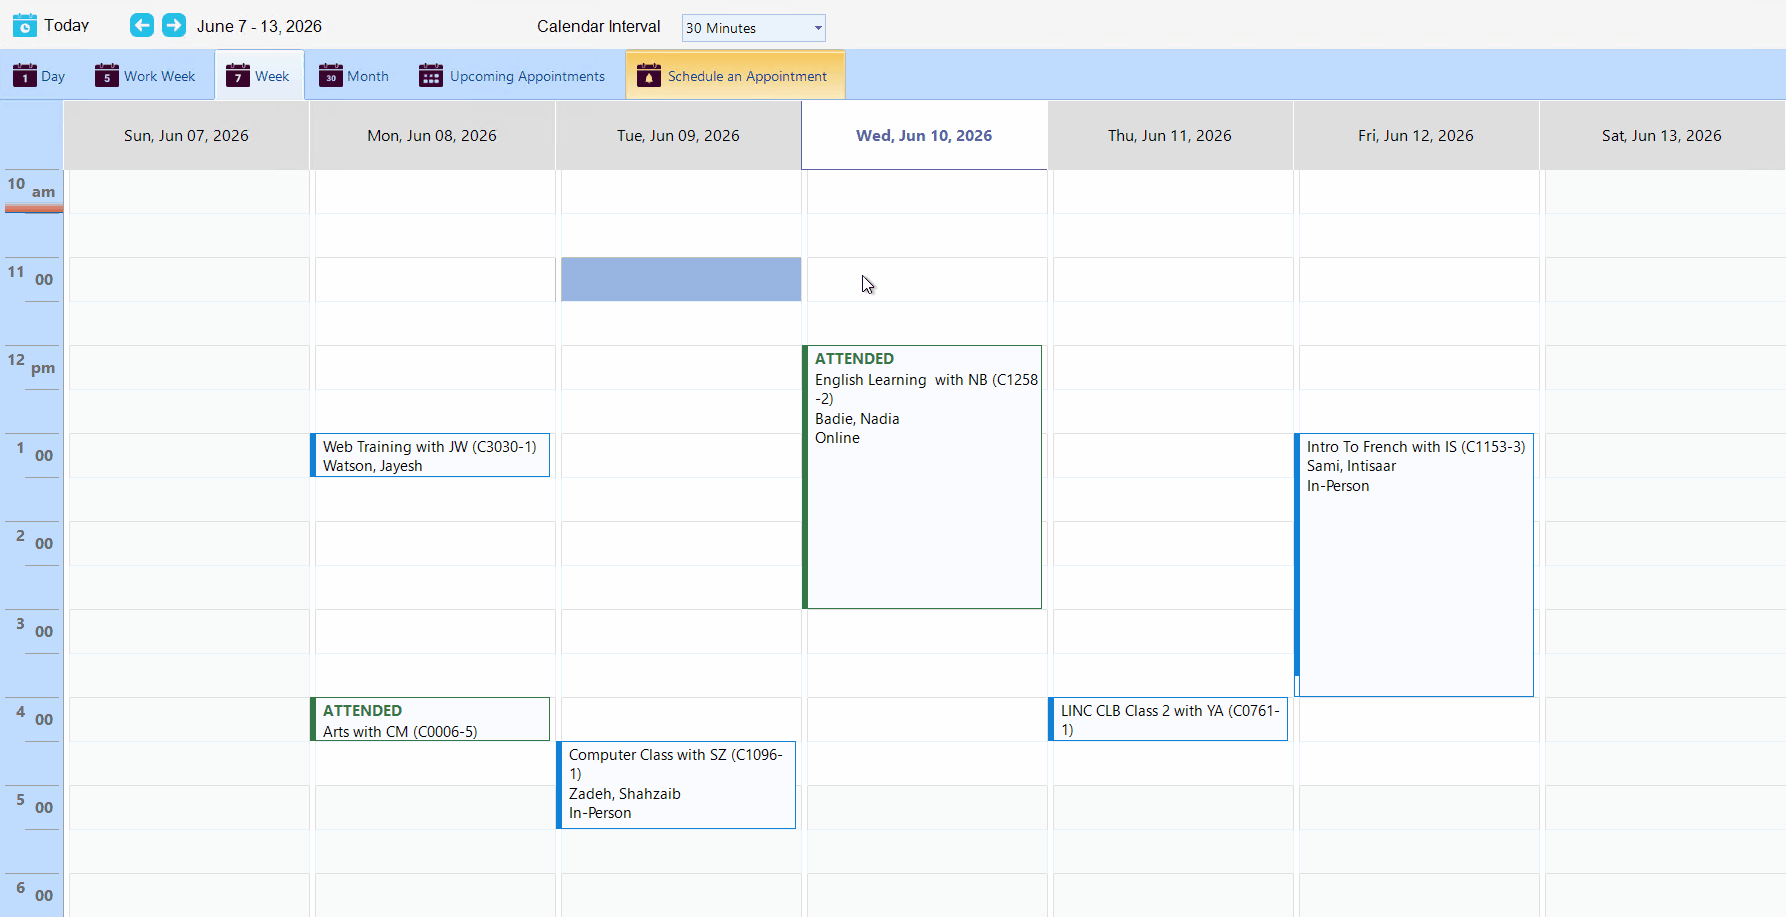
Step 1: Using the top navigation menu, click on the 'Calendar' button.
Step 2: Click the 'Schedule an Appointment' button or double-click a calendar cell on your desired date and time.

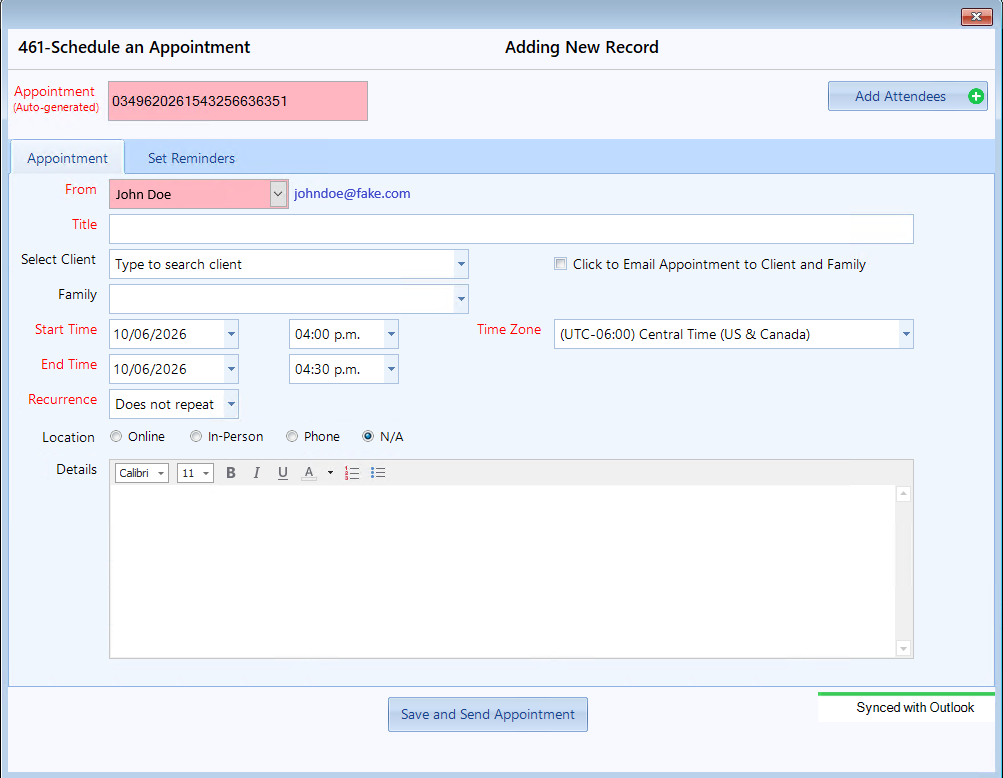
Step 3: Once clicked, the schedule appointment window will open, as shown below.
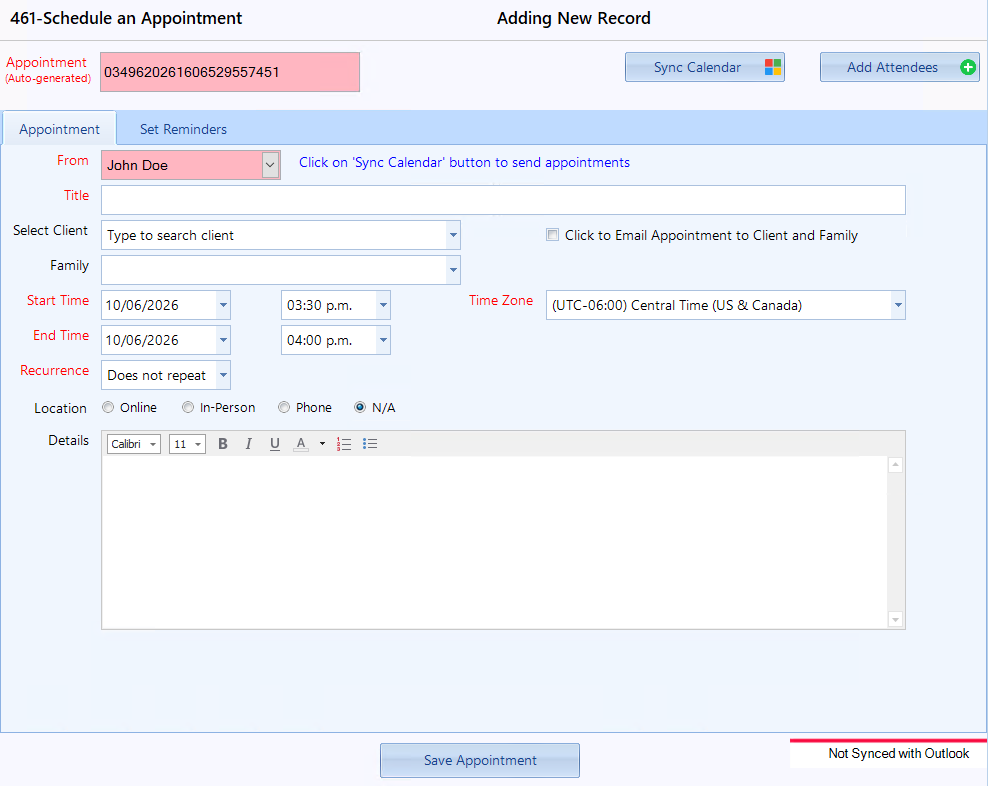
Step 4: Enter in the desired appointment information.
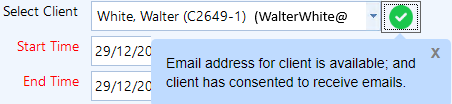
A warning sign may appear if the selected client hasn’t given consent to receive emails. Clicking the sign will show the reason.
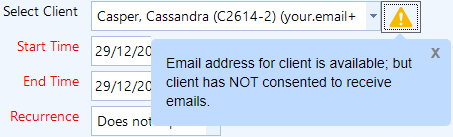
If there’s no warning, a green checkmark will indicate the client is eligible.
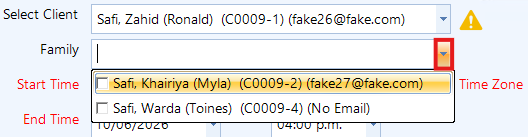
If the selected client has a family, then there will be options to select family members. If the client does not have any family members, then the drop down will be empty.
Title: You can enter a custom title for the appointment, or select a client with no title to let CARMIS auto-fill it with the client’s initials and clients code, maintaining security for both you and the client attached to the appointment.
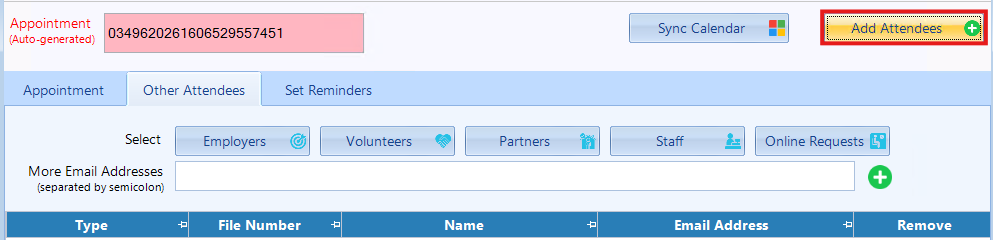
Step 5 (Add Attendees) (Optional): To add additional attendees click on the 'Add Attendees' button.
Step 6: Once you have filled out all information for the appointment, you will have 3 options to choose on how to save the appointment:
Save Appointment Button: Saves the appointment in CARMIS only, this will not reflect in you're Outlook calendar.
Save and Send Appointment: Saves the appointment in CARMIS and MS Outlook only for you, the client will not be notified (requires email authorization).
How to Sync your Microsoft 365 Account
If your Microsoft account is already authorized, then you can skip this section.
Step 1: Using the top navigation menu, click on the 'Calendar' button.
Step 2: Click the 'Schedule an Appointment' button.

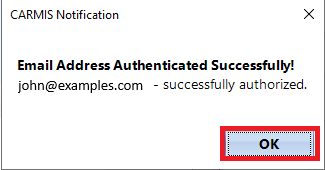
Step 3: Once clicked, the schedule appointment window will open. Click the 'Authorize Email' button and enter your Microsoft 35 credentials. CARMIS will let you know if authorization was successful.
Step 4: Once authorized, new features will appear in the 'Schedule an Appointment' window, as highlighted below.
Managing Appointments
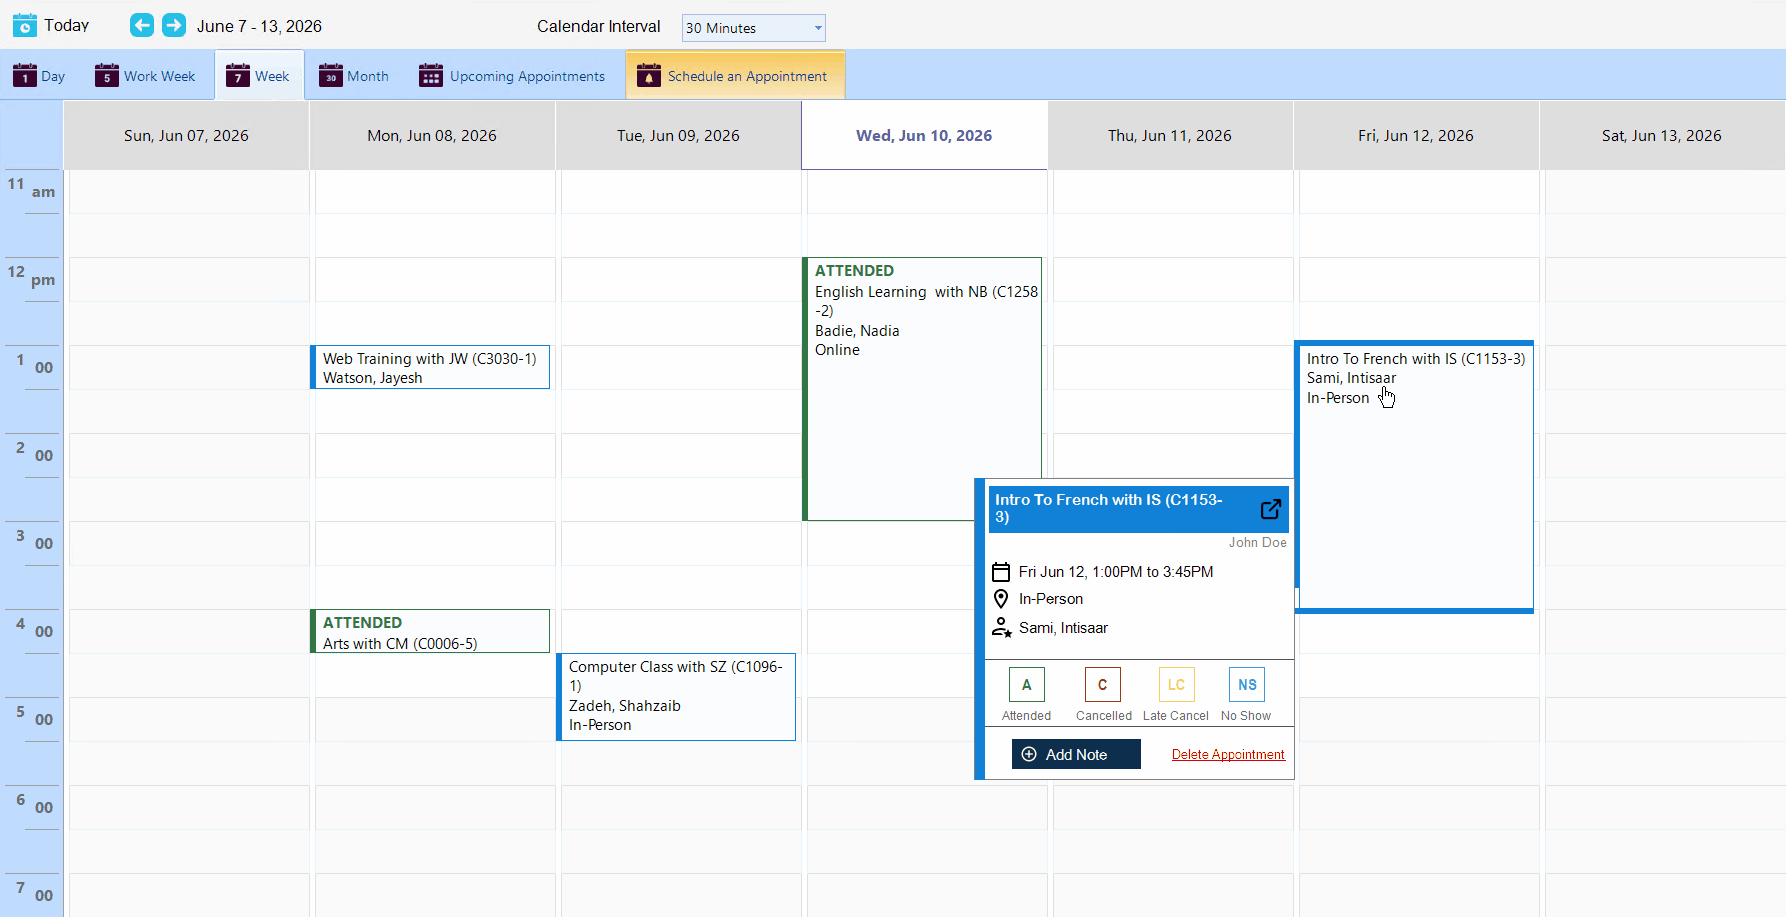
Step 1: Using the top navigation menu, click on the 'Calendar' button.
Step 2: Click on a appointment to bring up the appointment details.
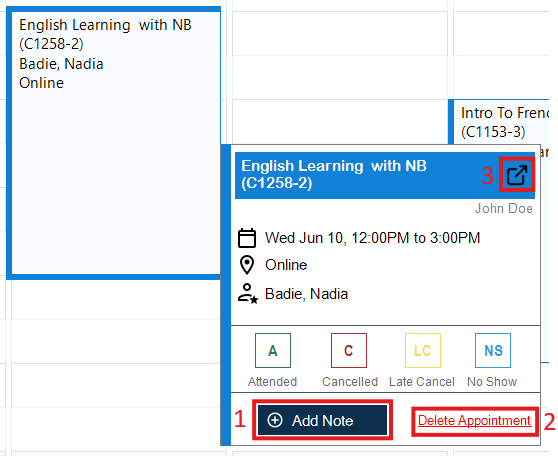
Adding Case Notes:
Click the "Add Note" button (see Box 1) to add a case note to the appointment. This opens the notes section, which includes the selected client details.
Deleting an Appointment:
Click the "Delete Appointment" button (see Box 2) in the appointment details. Confirm the deletion by clicking "Yes." Please note: Deleting an appointment will not remove its case notes; they will remain in the system.
Editing an Appointment:
Click the "Edit" button (see Box 3) to open the "Schedule Appointment" window. Make your changes and save.
How to Mark Attendance
Step 1: Using the top navigation menu, click on the 'Calendar' button.
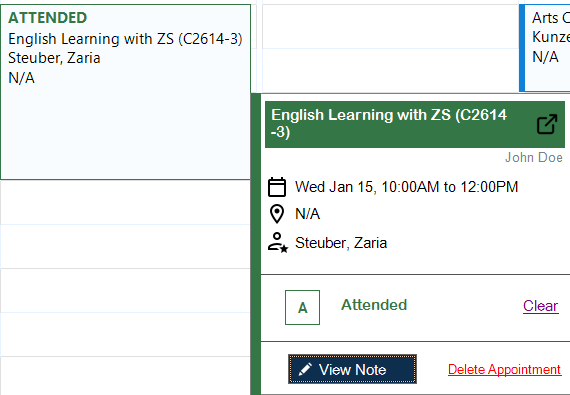
Step 2: Click an appointment to open its details.
Step 3: Select one of the 4 options, 'Attended', 'Cancelled', 'Late Cancel' or 'No Show'.

The appointment box will change to the corresponding colour.
Tips and Tricks
You can double-click on a appointment to open the schedule appointment window.
You can move an appointment to a different date or time, click and hold the appointment, then drag it to the desired location; this will update its date and time accordingly. Please note: if the appointments attendance has been marked then you cannot move the move the appointment.
Frequently Asked Questions (FAQs)
Q: How can I change the marked attendance to a different type?
A: If you have mistakenly selected the wrong attendance type, simply click the 'Clear' button to deselect it and choose the correct type.