CARMIS makes it easy to connect with your clients through powerful texting features. Send messages instantly or schedule them for later, and save reusable templates to work faster and more efficiently.
Note: If you want to activate this feature please contact us at Support@nsdtech.com.
Additional charges apply. See Pricing for more details.
Set up and compose your text message

Step 3: Start filling up the form. There are multiple fields:
- Send Text Form: Select the phone number the text message will be sent from. Note: Your agency can have more than one phone number.
- Under Program: If the text message is related to a specific program, choose the program from the dropdown menu.
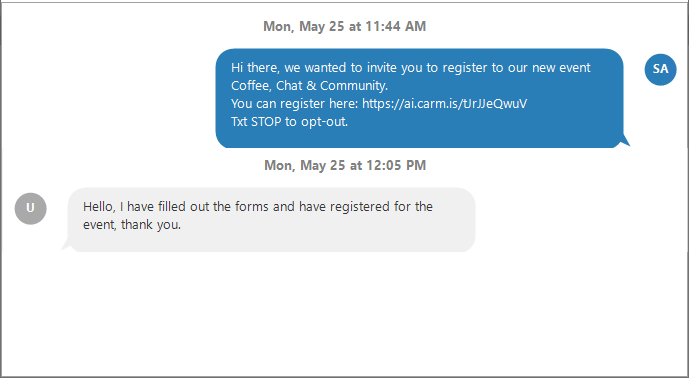
- For online Events: This field displays upcoming online registration events created in CARMIS. If a program was selected in the previous field, only upcoming online events related to that program will appear. After you have selected the event from the drop-down list, the system will automatically add the event URL to the body of the text message.
- Message Type: Choose the option that best matches the purpose of your message, such as Marketing or Reminder.
- Campaign line: Describe your campaign in a few words for future references.
- Select template: Load a previously saved template that you can reuse.
- Smart form(s): Include links to your agency’s Smart Forms, such as an intake form or volunteer form. Hovering over the
 icon will show how many characters a form will consume.

Step 5: The toggles below the text body will allow you set up different options:
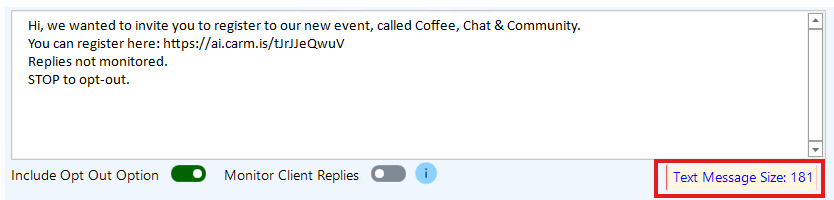
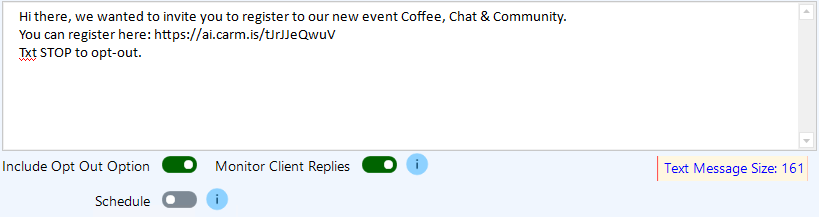
- Include Opt Out Option: When enabled, an opt‑out message is automatically added to the text, allowing recipients to reply STOP to unsubscribe.
Note: For Marketing and Announcement message types, this option is enabled by default and cannot be changed. - Monitor Client replies: This option is an indication to your clients whether their replies will be monitored or not. Note: Any client replies will consume credits based on the length of their messages.
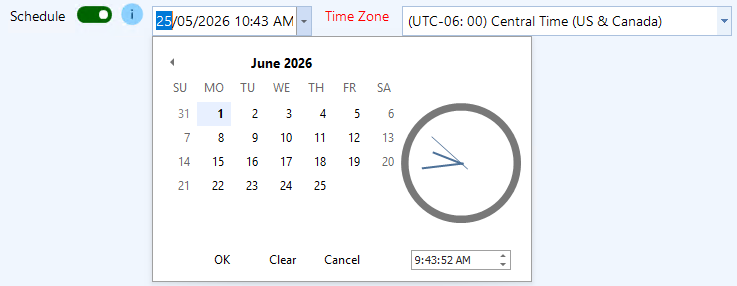
- Schedule: This option allows you to schedule the message to be sent on a specific date and time. Click here to know more.


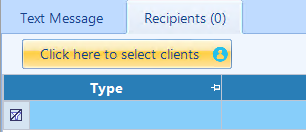
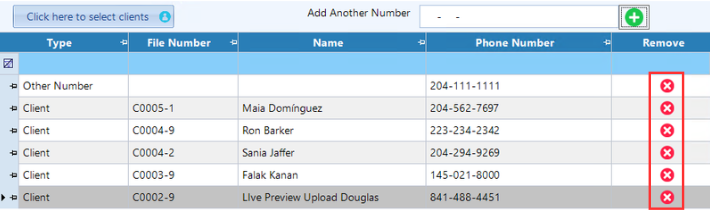
Step 7: Click the “Click here to select clients” button. This will open the client list, where you can search for clients, filter by Program or Registered For, and select the clients you want to send the text message to.
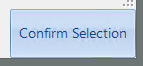
Once you have selected the clients, click Confirm Selection.

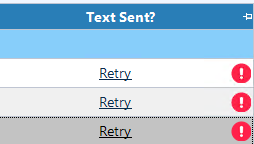
Step 12: For sent messages, you can view recipients chat history, in the recipients tab, click the pop-up icon to view the history.
Styled to look resemble mobile conversation for easy viewing.
Schedule Text Messages
How to save a template
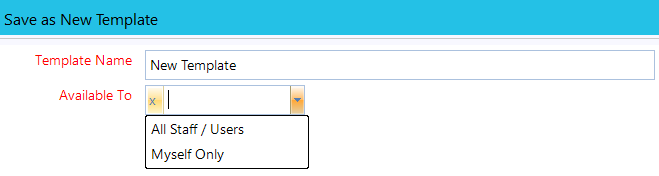
Step 1: Once you have written the body of the text message, click on the save this text as a new template button at the bottom of the screen.

How Credits work
On the top right of your screen you will see your credit balance and credits that will be used for each text message:
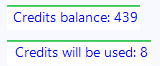
Note: Credits are calculated based on 160 characters per recipient. Messages longer than 160 characters will use multiple credits. Adding more recipients will also increase the total number of credits used. The credit count will update in the live preview as you enter the body of the text message. Once you send the text message, the credits that were used will be deducted from the credit balance.
Example: A 2‑part message sent to 4 recipients uses 8 credits.